

What Are Thermostat Remote Sensors and How Do They Function?
Quick Answer: Thermostat remote sensors are wireless devices that measure room temperature and humidity away from your main thermostat unit. They communicate via radio frequency or WiFi to send real-time temperature data back to your smart thermostat, enabling it to balance heating and cooling across multiple rooms. This technology prevents hot and cold spots by allowing your HVAC system to respond to actual conditions in different areas of your home, rather than relying solely on the temperature where your thermostat is mounted.
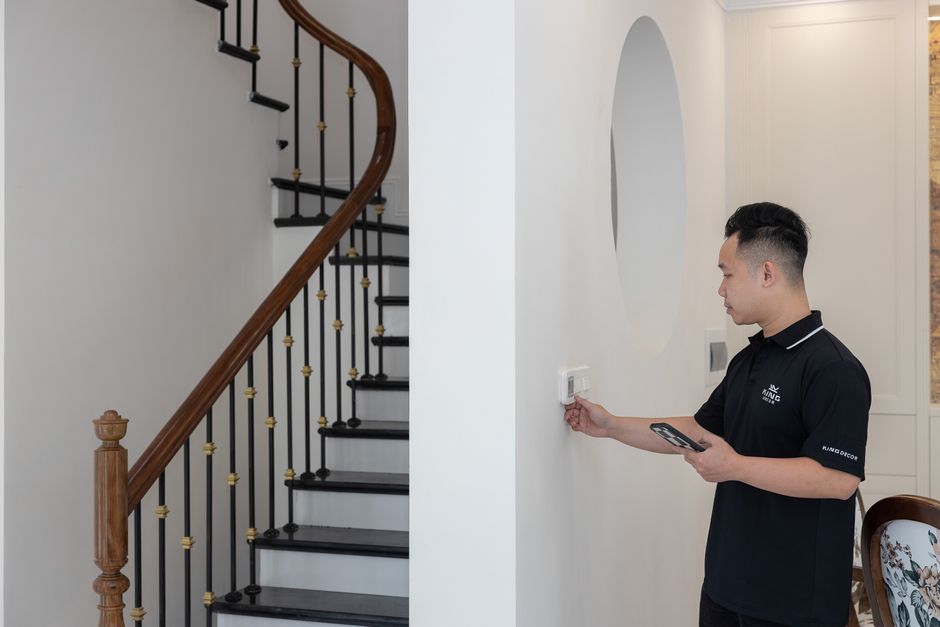
Remote sensors have become essential components of modern smart home heating systems. They work by continuously monitoring environmental conditions and transmitting that data wirelessly to your thermostat’s receiver. Most systems use secure, low-power radio frequencies to avoid interference with WiFi networks. The thermostat then processes multiple sensor readings and adjusts your heating or cooling output to maintain consistent temperatures throughout your home. This multi-zone approach is far more effective than single-point temperature monitoring.
Key Takeaway: Remote sensors enable your thermostat to understand temperature conditions across your entire home, not just in one location.
How Do Wireless Communication Protocols Power Remote Sensors?
Remote thermostat sensors rely on specific wireless communication standards to transmit data reliably. Most modern systems use proprietary 2.4 GHz radio frequencies, similar to Bluetooth but optimized for thermostat applications. These frequencies operate on unlicensed bands, allowing manufacturers to create closed-loop systems without regulatory approval. The signals typically have a range of 100 to 300 feet in open spaces, though walls and interference can reduce this distance.

Battery life is critical for remote sensors since they operate independently from your main thermostat. Most quality sensors use AA or AAA batteries and can last 18 to 36 months before replacement. The devices send temperature readings at regular intervals—typically every 30 seconds to 5 minutes—using minimal power transmission. This intermittent communication pattern extends battery life significantly compared to continuous broadcasting.
Radio Frequency Versus WiFi-Based Sensors
Radio frequency sensors use dedicated, closed communication channels between the sensor and your thermostat. This approach minimizes interference and provides consistent, reliable data transmission. WiFi-based sensors, by contrast, connect through your home network and can be monitored remotely via smartphone apps. WiFi sensors may drain batteries faster but offer superior remote access capabilities.
- Radio frequency: proprietary channels, longer battery life, limited remote access.
- WiFi sensors: network-dependent, shorter battery life, full smartphone integration.
- Hybrid systems: combine both technologies for flexibility and redundancy.
Key Takeaway: Your choice between radio frequency and WiFi sensors depends on whether you prioritize battery life or remote smartphone control.
Where Should You Place Remote Sensors for Optimal Performance?
Sensor placement directly impacts how well your thermostat can balance temperatures across your home. Ideally, sensors should be mounted in rooms where you spend the most time or in zones with the most temperature variation. Bedrooms, living rooms, and home offices are common placement locations. Avoid placing sensors near windows, doors, vents, or heat sources, as these locations create artificial temperature readings that don’t represent actual living conditions.

Height matters when installing remote sensors. Mount them 4 to 6 feet above the floor on an interior wall, away from direct sunlight. This height captures the temperature of the breathing zone where people actually experience comfort. Mounting too high or too low can cause your thermostat to make unnecessary adjustments. Additionally, ensure sensors are at least 6 feet away from your main thermostat unit to prevent signal overlap and feedback loops.
Common Placement Mistakes to Avoid
- Placing sensors in kitchens near ovens or appliances that generate heat.
- Mounting sensors on exterior walls that experience temperature swings.
- Installing sensors in direct sunlight from windows or skylights.
- Positioning sensors too close to air vents or return ducts.
- Placing multiple sensors in the same room, creating redundant data.
Test your sensor placement by observing temperature readings for several days. If readings seem inconsistent or don’t match your comfort experience, relocate the sensor to a more neutral location. Most wireless sensors allow easy repositioning without professional installation.
Key Takeaway: Strategic sensor placement on interior walls away from heat sources ensures accurate temperature readings and optimal HVAC performance.
How Does Your Thermostat Use Multiple Sensor Readings?
When your smart thermostat receives data from multiple remote sensors, it processes this information using sophisticated algorithms to determine the best heating or cooling strategy. Most systems calculate an average temperature across all active sensors, while premium models weight readings based on room size or occupancy patterns. This intelligent processing prevents any single room’s temperature from dominating your HVAC system’s behavior. The thermostat then makes micro-adjustments to your heating or cooling output to bring all monitored zones closer to your target temperature.

Some advanced thermostats in 2026 incorporate machine learning to optimize sensor data interpretation. These systems learn which rooms heat or cool fastest, which areas experience drafts, and how occupancy patterns affect temperature preferences. Over time, the thermostat becomes better at predicting temperature changes and preventing discomfort before it occurs. This predictive capability significantly improves energy efficiency while maintaining consistent comfort throughout your home.
Temperature Averaging and Priority Modes
Different thermostat models handle multiple sensor data differently. Some calculate simple averages, while others allow you to set priority rooms. Priority mode ensures your main living areas reach target temperature first, even if bedrooms lag behind. This approach is particularly useful in larger homes where simultaneous temperature balancing across all rooms is impractical.
- Simple averaging: all sensors weighted equally in temperature calculations.
- Priority mode: specific rooms take precedence in HVAC adjustments.
- Occupancy-based: sensors in occupied rooms receive higher weight automatically.
- Time-based scheduling: different priority patterns for day and night modes.
Key Takeaway: Modern thermostats use intelligent algorithms to process multiple sensor readings and optimize comfort across your entire home.
What Technical Specifications Matter When Choosing Remote Sensors?
Battery type and lifespan are primary specifications to evaluate. Look for sensors using standard AA or AAA batteries rather than proprietary rechargeable packs, as replacements are inexpensive and readily available. Temperature accuracy is equally important—quality sensors maintain accuracy within ±0.5 degrees Fahrenheit. Humidity sensing capability, while optional, provides valuable data for controlling moisture levels and improving indoor air quality.

Communication range specifications tell you how far signals can travel from the main thermostat. Manufacturers typically provide range estimates for open space and through walls. A minimum range of 100 feet through walls ensures coverage in most homes. Check compatibility explicitly—not all remote sensors work with every thermostat brand. Some manufacturers offer proprietary systems, while others support open standards like Zigbee or Z-Wave for broader compatibility.
Key Specifications Comparison
- Battery life: 18-36 months for quality AA/AAA-powered sensors.
- Temperature accuracy: ±0.5°F to ±1.0°F for standard models.
- Communication range: 100-300 feet depending on walls and interference.
- Update frequency: readings every 30 seconds to 5 minutes.
- Humidity sensing: optional feature for advanced climate control.
Key Takeaway: Prioritize battery life, temperature accuracy, and verified compatibility when selecting remote sensors for your thermostat system.
How Can You Troubleshoot Remote Sensor Connection Issues?
If your remote sensors stop communicating with your thermostat, start by checking battery levels. Low batteries are the most common cause of sensor disconnection. Replace batteries and wait 2-3 minutes for the sensor to reconnect. Next, verify that the sensor is within the specified communication range and not blocked by metal objects or dense materials like concrete. If you’ve recently moved the sensor, try repositioning it closer to the main thermostat unit temporarily to test connectivity.
Check for radio frequency interference from other devices operating on the 2.4 GHz band. Cordless phones, microwaves, and certain WiFi routers can disrupt sensor signals. Try moving the sensor away from these devices or relocating your WiFi router. If interference persists, contact your thermostat manufacturer for advice on frequency adjustments or alternative placement strategies. For WiFi-based sensors, ensure your home network is stable and that the sensor has sufficient signal strength.
Step-by-Step Troubleshooting Process
- Replace sensor batteries with fresh alkaline batteries.
- Wait 3-5 minutes for the sensor to establish connection.
- Check your thermostat’s display for sensor status confirmation.
- Move the sensor closer to the main thermostat if still not detected.
- Remove metal objects or obstacles between sensor and thermostat.
- Restart your thermostat by turning off power for 30 seconds.
- Re-pair the sensor using your thermostat’s pairing mode if available.
Key Takeaway: Most sensor connection problems stem from low batteries or communication range issues, both easily resolved through simple troubleshooting steps.
How Do Remote Sensors Improve Energy Efficiency?
Remote sensors enable your HVAC system to operate more efficiently by providing accurate feedback about actual temperature conditions throughout your home. Without remote sensors, your thermostat relies on a single location’s temperature, often leading to unnecessary heating or cooling cycles. With multiple sensors, your system can detect when certain rooms have reached target temperature and reduce output accordingly, preventing energy waste. This targeted approach can reduce heating and cooling costs by 10 to 15 percent, depending on your home’s layout and insulation quality.
The efficiency gains extend beyond simple temperature balancing. Remote sensors enable smart scheduling that aligns HVAC operation with actual occupancy patterns. If sensors detect no activity in certain rooms, your system can reduce conditioning in those areas. During shoulder seasons when outdoor temperatures are mild, sensors help your thermostat make subtle adjustments that minimize runtime while maintaining comfort. For more information on thermostat savings, see our complete breakdown on smart thermostat energy savings in 2026.
Key Takeaway: Multi-sensor systems reduce HVAC runtime and energy consumption by optimizing heating and cooling based on actual conditions across your home.
Practical Tips for Installing and Maintaining Remote Sensors
Installation of remote sensors requires minimal technical skill for most homeowners. Begin by reading your thermostat’s manual to understand pairing procedures and compatibility requirements. Most systems use a simple pairing mode where you press a button on both the sensor and thermostat to establish connection. Place the sensor in your chosen location, ensuring it’s on an interior wall at least 4 to 6 feet above the floor. Secure the sensor using the included adhesive strip or mounting bracket, ensuring it’s level and stable.
Maintenance involves regular battery replacement and occasional cleaning. Check battery levels quarterly, especially as the 18 to 36-month lifespan approaches. Replace batteries with fresh alkaline units of the same type. Clean sensor vents and openings with a soft, dry cloth to prevent dust accumulation that might affect temperature readings. Avoid using liquids or harsh chemicals on sensors. If your sensors support it, update firmware periodically through your thermostat’s app or control panel to maintain compatibility and security.
Installation Checklist
- Read thermostat manual for pairing instructions and compatibility verification.
- Choose installation locations away from heat sources, windows, and vents.
- Install fresh batteries before mounting sensors.
- Mount sensors 4-6 feet high on interior walls using adhesive or brackets.
- Pair sensors using your thermostat’s pairing mode.
- Test sensor readings on your thermostat display for accuracy.
- Document sensor locations for future reference and maintenance.
Key Takeaway: Proper installation and regular battery maintenance ensure reliable sensor performance and consistent temperature control throughout your home.
What Are the Limitations of Thermostat Remote Sensors?
Remote sensors have practical limitations that homeowners should understand. Most systems support only 2 to 8 sensors simultaneously, limiting their effectiveness in very large homes with multiple distinct zones. Adding more sensors beyond the manufacturer’s limit can cause communication conflicts and unreliable readings. Additionally, sensors measure ambient temperature but cannot account for factors like humidity, air quality, or occupant preferences in specific rooms. They also require regular battery replacement, creating an ongoing maintenance burden for some homeowners.
Radio frequency sensors cannot be monitored remotely via smartphone, limiting their appeal to tech-savvy users. WiFi-based sensors address this limitation but typically consume batteries faster and depend on network stability. In homes with poor WiFi coverage or frequent network outages, WiFi sensors may disconnect frequently. For homes with complex HVAC systems serving multiple distinct zones, dedicated zone control dampers combined with sensors provide better control than remote sensors alone. Consider your home’s layout and needs before committing to a multi-sensor system.
Key Takeaway: Remote sensors work best in homes with 2-4 key temperature zones and reliable WiFi or radio frequency coverage throughout.
How Do Remote Sensors Compare to Zone Control Systems?
Remote sensors and zone control systems serve similar purposes but operate differently. Remote sensors measure temperature in multiple rooms and send data to a single thermostat that adjusts one HVAC system. Zone control systems use motorized dampers in your ductwork to direct airflow to specific areas independently. Sensors are less expensive and easier to install, requiring no ductwork modifications. Zone systems offer more precise control but demand professional installation and higher upfront costs.
For most homes, remote sensors provide adequate temperature balancing at a fraction of zone system costs. However, homes with dramatically different heating and cooling needs in separate areas—such as a sunroom that gets extremely hot or a basement that stays cold—benefit more from zone control. Many modern homes combine both technologies: remote sensors provide feedback while zone dampers control airflow distribution. This hybrid approach delivers optimal comfort and efficiency for complex home layouts.
Key Takeaway: Remote sensors offer affordable temperature balancing for most homes, while zone control systems provide superior precision at higher cost.
Frequently Asked Questions
How far can thermostat remote sensors communicate with the main unit?
Most quality remote sensors communicate reliably within 100 to 300 feet of the main thermostat, depending on walls and interference. Open spaces allow maximum range, while walls and metal objects reduce signal strength. Check your specific thermostat’s specifications for exact range claims. If your home exceeds the rated range, consider relocating your main thermostat or using a WiFi-based sensor system with network coverage throughout your home.
How often do remote sensor batteries need replacement?
Standard AA or AAA batteries in quality remote sensors typically last 18 to 36 months before requiring replacement. Battery life depends on sensor update frequency, temperature changes, and battery quality. Check battery levels quarterly and replace them proactively to avoid unexpected disconnections. Some sensors alert you on your thermostat when battery levels run low, giving you advance warning before complete discharge.
Can I use remote sensors from different manufacturers with my thermostat?
Most thermostat systems use proprietary sensor protocols, meaning you must use sensors designed by the same manufacturer. Some newer thermostats support open standards like Zigbee or Z-Wave, allowing third-party sensor compatibility. Always verify compatibility before purchasing sensors. Mixing incompatible sensors can result in connection failures and unreliable temperature readings across your home.
Do remote sensors work with smart thermostats that lose WiFi connection?
Yes, remote sensors function independently of WiFi connectivity. Radio frequency sensors use dedicated wireless channels unaffected by WiFi outages. However, if your thermostat loses WiFi, you’ll lose remote smartphone access and cloud-based scheduling features. For more information on WiFi stability issues, see our complete troubleshooting guide for smart thermostat WiFi problems in 2026.
Can remote sensors detect humidity levels?
Some advanced remote sensors include humidity sensing capabilities, though this feature is optional on many models. Humidity sensors help your thermostat manage moisture levels and improve indoor air quality. Check your sensor specifications to determine if humidity sensing is included. Humidity data allows more sophisticated climate control but typically increases sensor cost and battery consumption slightly.
What happens if a remote sensor battery dies?
When a sensor battery dies, that sensor stops transmitting temperature data to your thermostat. Your thermostat will continue operating using readings from remaining active sensors. If you have only one sensor, your system reverts to using the main thermostat’s built-in temperature reading. Most thermostats alert you when a sensor battery is low or disconnected, allowing you to replace it before complete failure occurs.
How Can Remote Sensors Enhance Your Home Comfort in 2026?
Thermostat remote sensors represent a practical upgrade for homeowners seeking improved comfort and energy efficiency. They eliminate hot and cold spots by enabling your HVAC system to respond to actual temperature conditions throughout your home, not just in one location. Modern sensors are affordable, easy to install, and require minimal maintenance beyond battery replacement. Whether you’re upgrading an older thermostat or installing a new smart system, remote sensors provide significant comfort improvements at reasonable cost.
The technology continues evolving in 2026, with improved battery life, better interference resistance, and enhanced integration with smart home ecosystems. If you’re considering a multi-room temperature control solution, remote sensors offer an excellent balance of effectiveness and simplicity. They work particularly well in homes with 2 to 4 distinct temperature zones and consistent WiFi or radio frequency coverage. For homes with more complex requirements, combining remote sensors with zone control dampers creates a comprehensive climate control system that handles virtually any heating or cooling challenge.
Start by assessing your home’s layout and identifying rooms where temperature varies most significantly. Install sensors in those key areas and observe how your thermostat responds over several weeks. Fine-tune sensor placement as needed based on actual comfort experience. With proper installation and maintenance, remote sensors will provide years of reliable service and noticeably improved temperature consistency throughout your home.
Key Takeaway: Remote sensors enable affordable, effective multi-room temperature balancing that improves comfort and reduces energy costs in most homes.



Write Your Review
No reviews yet. Be the first to share your experience!