

How Do You Install Sensors on Electrical Service Mains?
Installing sensors on your electrical service mains allows you to monitor real-time energy consumption across your entire home, providing critical data for optimizing energy use and reducing utility costs. The primary method involves using current transformer (CT) clamps that wrap around the main service lines without requiring direct circuit interruption. Most homeowners can complete this installation in 30 to 60 minutes by attaching non-invasive CT sensors to the main service conductors, then connecting them to a compatible energy monitoring hub. The key advantage is that CT clamps eliminate the need for a licensed electrician in many cases, making this a cost-effective DIY solution. However, you must work safely around live electrical equipment and follow all local electrical codes. Understanding your electrical panel layout, selecting the right sensor type, and properly calibrating your monitoring system are essential steps to ensure accurate readings and long-term reliability.
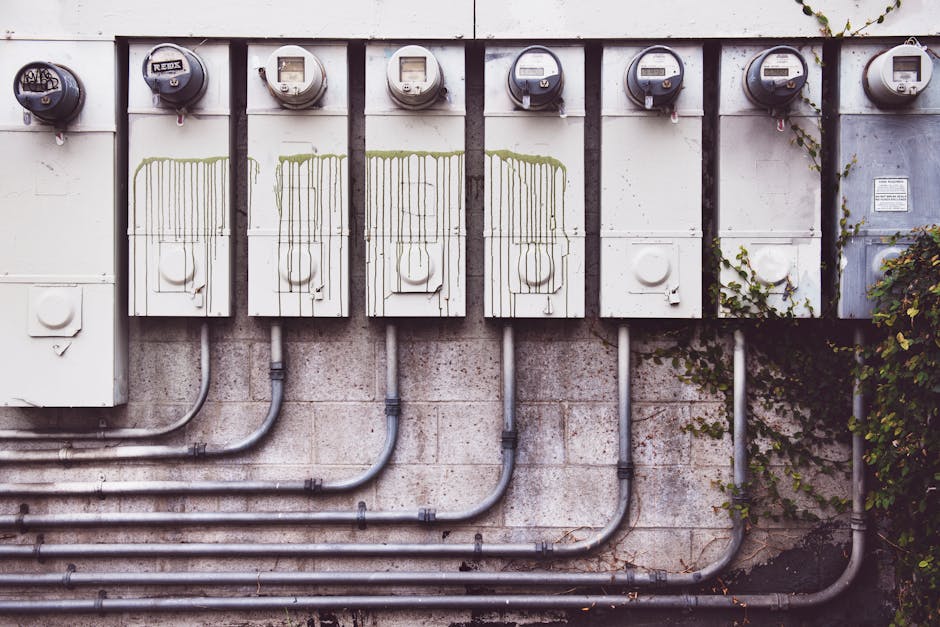
Installing sensors on electrical service mains represents one of the most impactful smart home upgrades available in 2026. Unlike individual appliance monitors, main service sensors capture your complete energy profile, revealing consumption patterns that help identify energy waste and track the effectiveness of efficiency improvements. This data becomes invaluable when managing electric vehicle charging schedules, coordinating with time-of-use utility rates, or planning home electrification projects. The technology has matured significantly, with numerous compatible platforms now supporting main service monitoring through Z-Wave, WiFi, and proprietary protocols. Whether you’re building a comprehensive smart home energy management system or simply seeking better visibility into your consumption, installing main service sensors is the logical starting point for data-driven energy decisions.
What Are the Safety Considerations When Working with Electrical Service Mains?
Working around electrical service mains requires absolute respect for safety protocols. Your main service panel contains live electrical current at all times, even when individual breakers are switched off. The main disconnect switch itself carries the full service amperage—typically 100 to 200 amps in residential installations—and touching live conductors can be fatal. Before beginning any work, verify your local electrical code requirements. Some jurisdictions require licensed electrician involvement for any main panel work, while others permit homeowners to install non-invasive sensors without direct contact to conductors.
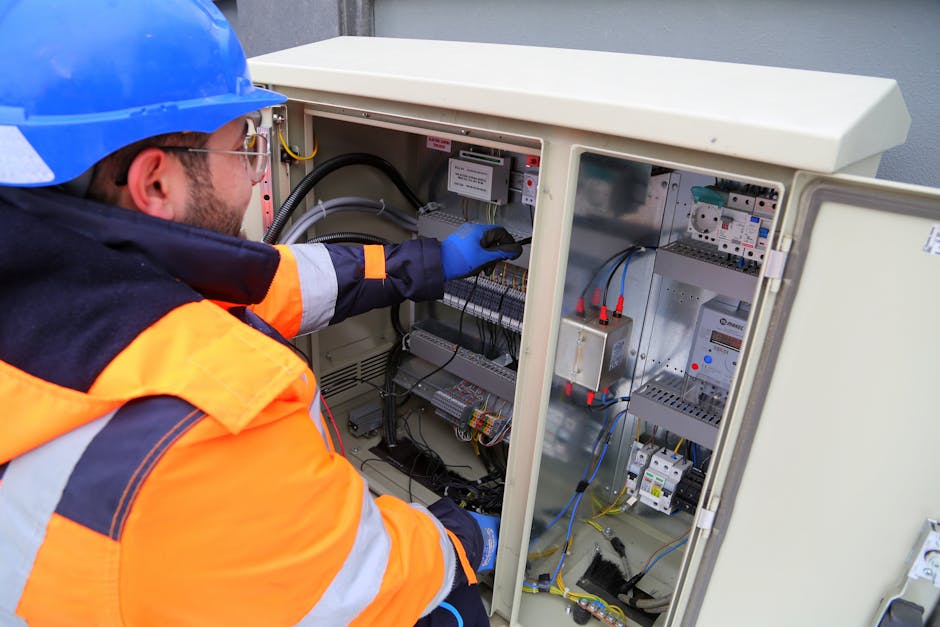
Always wear appropriate personal protective equipment including safety glasses and insulated gloves rated for your service voltage. Never work alone, and ensure someone nearby knows what you’re doing and can call emergency services if needed. Turn off all unnecessary circuits to reduce the likelihood of accidental contact. Most importantly, CT clamps are specifically designed to avoid direct conductor contact—they wrap around the outside of service lines, making them inherently safer than other monitoring methods. If you feel uncomfortable working near your electrical panel, hire a licensed electrician to perform the installation. Your safety is worth far more than the labor cost savings.
Which Type of Sensors Should You Choose for Main Service Monitoring?
Current transformer (CT) clamps are the industry standard for main service monitoring in 2026. These non-invasive sensors detect the magnetic field generated by current flowing through conductors, converting this information into usable energy data. CT clamps come in various sizes—typically ranging from 50 amps to 200 amps—and you must select clamps matching your service amperage. Standard residential services use either 100-amp or 200-amp main conductors, so verify your panel’s rating before purchasing.
Dual-clamp systems are essential for three-wire residential services (two hot legs plus neutral). Each hot conductor carries approximately half your total load, so monitoring both provides accurate whole-home consumption data. Some monitoring hubs include built-in CT clamps, while others require separate sensor purchases. Accuracy specifications typically range from 1 to 2 percent, meaning a 10-kilowatt reading might vary by 100 to 200 watts. This level of precision is more than adequate for identifying consumption patterns and tracking efficiency improvements. When selecting sensors, verify compatibility with your chosen monitoring hub—Z-Wave sensors work with Z-Wave hubs, WiFi sensors require network connectivity, and proprietary systems only function with their manufacturer’s equipment. Check the SmartThings or Aeotec websites for current sensor compatibility listings.
How Do You Safely Access Your Electrical Panel for Sensor Installation?
Accessing your electrical panel safely begins with careful preparation and planning. Start by photographing your current panel setup—document the main breaker location, service amperage rating (visible on the main breaker itself), and the physical layout of conductors entering the panel. This reference material proves invaluable if you need to stop mid-installation or consult with an electrician.
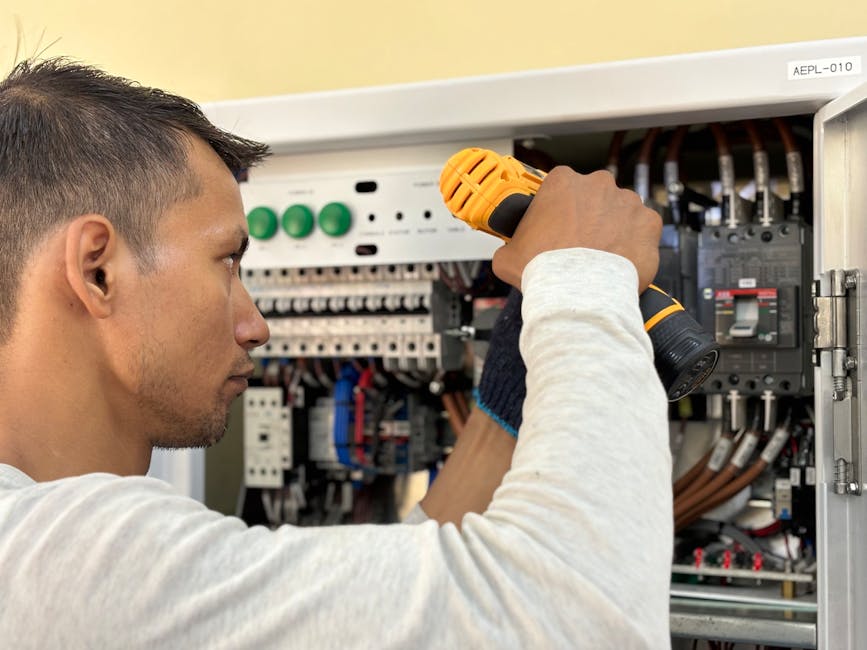
Turn off all non-essential circuits using individual breakers. This reduces the overall load on the main service and minimizes the risk of arc flash if accidental contact occurs. Do not turn off the main breaker itself—this remains live even when switched off. Open your panel door and allow your eyes to adjust to the interior lighting. Identify the two main service conductors entering the panel from above or below. These large-diameter wires—typically 2 to 4 inches in diameter—are where you’ll install CT clamps. Never touch these conductors or allow tools to contact them. Keep one hand in your pocket while working to prevent accidental two-point contact across your body, which could complete a dangerous circuit. Work methodically and deliberately, avoiding rushed movements that could cause slips or contact with live parts. If at any point you feel uncertain, stop work immediately and consult a licensed electrician. The installation can wait; your safety cannot.
What Is the Step-by-Step Installation Process for CT Clamp Sensors?
Follow this systematic approach to install CT clamp sensors on your main service conductors:
Step 1: Preparation and Verification
Verify your service amperage by reading the main breaker rating. Confirm CT clamp size matches this rating—typically 100-amp or 200-amp clamps for residential services. Check that your monitoring hub is powered and accessible before starting installation. Have all components laid out and ready within arm’s reach of your panel.
Step 2: Positioning the First Clamp
Open the CT clamp hinge mechanism. Position it around the first main service conductor (typically the left hot leg in standard three-wire service). The clamp should encircle the conductor completely without touching the insulation jacket. Ensure the clamp closes fully with an audible click. Never force a clamp that doesn’t fit properly—this indicates incorrect sizing.
Step 3: Installing the Second Clamp
Repeat the process with the second CT clamp on the second main service conductor (the right hot leg). Both clamps must be properly seated and closed. The neutral conductor should not have a clamp—it carries return current and would provide duplicate readings if monitored.
Step 4: Connecting to the Monitoring Hub
Route sensor cables from the CT clamps to your monitoring hub location. Most hubs mount on a nearby wall or shelf within the electrical room. Follow the hub manufacturer’s specific connection instructions—typically, sensor cables connect to labeled input ports on the hub. Ensure connections are secure and cables aren’t pinched or damaged.
Step 5: Configuration and Testing
Power on the monitoring hub and access its configuration interface via your smartphone app or web portal. Most hubs require you to input your CT clamp rating (100-amp, 200-amp, etc.) and confirm the correct phase assignment. The system will begin collecting data immediately. Check that consumption readings appear within 5 to 10 minutes and roughly match your utility meter readings.
Step 6: Calibration and Verification
Allow the system to run for 24 to 48 hours, then compare cumulative energy readings against your utility meter. Most systems achieve 1 to 2 percent accuracy. If readings differ by more than 5 percent, verify CT clamp sizing, phase assignment, and hub calibration settings. Consult the manufacturer’s troubleshooting guide or contact their support team for assistance.
How Can You Ensure Accurate Energy Readings After Installation?
Accurate readings depend on proper calibration and correct sensor configuration. First, verify that both CT clamps are rated for your service amperage—mismatched clamp sizes produce unreliable data. Second, confirm that the monitoring hub correctly identifies which clamp connects to which phase. Most hubs allow you to label phases as “Phase A” and “Phase B” or “Leg 1” and “Leg 2.” Incorrect phase assignment won’t prevent the system from functioning, but it may produce confusing or inaccurate load distribution data.
Compare your monitoring hub’s cumulative kilowatt-hour readings against your utility meter over a one-week period. To do this accurately, note your utility meter reading at the start of the week and again at the end. Simultaneously record your monitoring hub’s cumulative consumption. The difference should match within 2 to 3 percent. If discrepancies exceed 5 percent, check these items: Are both CT clamps properly closed and seated? Is the monitoring hub calibrated to your correct service amperage? Have you confirmed the hub is receiving data from both clamps? Are there any loose cable connections? Most accuracy problems resolve through simple recalibration or cable repositioning.
Temperature fluctuations can slightly affect CT clamp performance, so readings may vary slightly between summer and winter months. This is normal and expected. If you’ve verified everything and still experience significant discrepancies, your CT clamps may be defective—contact the manufacturer for warranty replacement.
How Do You Integrate Main Service Sensors with Your Smart Home System?
Integrating main service sensors into your broader smart home ecosystem unlocks powerful automation and analytics capabilities. Most modern monitoring hubs support integration with popular platforms including Home Assistant, SmartThings, and manufacturer-specific ecosystems. Begin by selecting a hub that supports your preferred smart home platform. Tracking energy use per appliance becomes much more effective when combined with whole-home main service data, allowing you to correlate specific appliance operation with total consumption patterns.
Once your hub is installed and calibrated, access its integration settings through the manufacturer’s app or web interface. Most hubs provide API credentials or direct integration options that connect to your smart home hub. For Z-Wave sensors, add the hub as a new Z-Wave device to your Z-Wave controller. For WiFi-based systems, connect the hub to your home network and authenticate it with your smart home platform account. After integration, energy consumption data becomes available as entities or devices within your smart home system. You can then create automations that respond to consumption thresholds—for example, automatically reducing HVAC loads when consumption exceeds a certain level, or scheduling dishwasher operation during off-peak hours to minimize demand charges.
Advanced users can export energy data for analysis in spreadsheet applications or visualization tools. This capability allows you to download home energy data in CSV format for detailed trend analysis and reporting. The combination of real-time monitoring, historical data storage, and smart home automation creates a comprehensive energy management system that continuously optimizes your home’s efficiency and reduces utility costs.
What Are Common Installation Mistakes to Avoid?
Understanding common pitfalls helps you achieve a successful installation on your first attempt. The most frequent mistake is selecting CT clamps with incorrect amperage ratings. If your service is 200 amps and you install 100-amp clamps, readings will be inaccurate and potentially dangerously misleading. Always verify your service amperage before purchasing sensors.
Another common error involves improper clamp positioning. CT clamps must encircle the entire conductor with the clamp completely closed. Partially closed clamps or clamps that don’t fully engage produce erratic readings. Some installers accidentally clamp the neutral conductor instead of one of the two hot legs, which creates duplicate or inverted readings. Remember: clamp the two large hot conductors only, never the neutral.
Cable management mistakes also cause problems. Sensor cables should be routed away from high-voltage equipment and secured to prevent accidental disconnection. Loose connections are the leading cause of intermittent data loss. Verify all connections are tight before closing your electrical panel.
Calibration errors represent another significant category of mistakes. Failing to input the correct CT clamp rating into your monitoring hub produces systematically inaccurate readings. Some users also forget to account for single-phase versus three-phase service—residential homes are almost always single-phase, but confirming this prevents confusion.
Finally, many installers neglect to verify readings against their utility meter after installation. This simple 5-minute verification catches most configuration errors before they become problematic. If readings differ by more than 5 percent, troubleshoot immediately rather than accepting inaccurate data as normal.
How Do You Troubleshoot Common Issues After Installation?
If your monitoring system isn’t functioning as expected, follow this troubleshooting sequence. First, verify that the monitoring hub is powered and connected to your network. Check the hub’s status lights or app interface—most hubs display green indicators when functioning normally and red or amber indicators when experiencing problems. If the hub shows offline status, restart it by unplugging for 30 seconds and reconnecting. This resolves most temporary connectivity issues.
Second, physically inspect both CT clamps. Open your electrical panel and visually confirm that both clamps are completely closed and properly seated around their respective conductors. A clamp that’s partially open won’t detect current properly. If a clamp appears loose, carefully close it fully—you should hear a distinct click when it’s properly engaged.
Third, verify cable connections between CT clamps and the monitoring hub. Loose or disconnected cables are the leading cause of data loss. Gently pull on each cable to confirm it’s firmly seated in its connector port. If a cable is damaged or frayed, replace it immediately.
Fourth, check your hub’s configuration settings. Access the hub’s interface and confirm that the CT clamp rating matches your service amperage. Incorrect settings produce systematically wrong readings. Also verify that both phases are enabled and properly labeled.
If consumption readings are present but inaccurate, compare them against your utility meter as described earlier. A consistent 5 to 10 percent error is often normal and acceptable. If errors exceed this range, recalibrate your hub’s CT clamp settings and retest.
For persistent issues, consult the hub manufacturer’s troubleshooting guide or contact their technical support team. Provide them with your hub model number, service amperage, and a description of the problem. Most manufacturers offer email or phone support and can usually diagnose issues within 24 hours.
What Tools and Materials Do You Need for Installation?
Essential Tools:
- Insulated screwdrivers (flathead and Phillips)
- Insulated pliers or wire strippers
- Non-contact voltage tester (to verify power-off status)
- Flashlight or headlamp for panel visibility
- Camera or smartphone for documentation
- Measuring tape for clamp sizing verification
Required Materials:
- CT clamps (correctly sized for your service amperage)
- Monitoring hub compatible with your chosen platform
- Sensor cables (usually included with hub)
- Cable ties or clips for routing and securing cables
- Electrical tape for labeling and securing connections
Optional but Recommended:
- Insulated work gloves rated for your service voltage
- Safety glasses to protect against accidental debris
- Small step ladder for comfortable panel access
- Notebook for documenting configuration settings
Most of these items are inexpensive and available at hardware stores or online retailers. The most critical investment is the monitoring hub itself, which typically costs $100 to $300 depending on features and platform compatibility.
How Do You Maintain Your Main Service Sensors for Long-Term Reliability?
Proper maintenance ensures your sensors continue providing accurate data for years. CT clamps are passive devices with no moving parts, so they require minimal maintenance. However, annual visual inspections are worthwhile. Once yearly, open your electrical panel and visually verify that both clamps remain fully closed and properly positioned around their conductors. Over time, vibration from heavy loads can occasionally loosen a clamp—simply re-tightening it restores normal operation.
Check cable connections annually as well. Gently tug each cable to confirm it remains firmly seated. If you notice any visible damage to cable insulation, replace the cable immediately to prevent shorts or data loss. Temperature cycling and thermal expansion can occasionally loosen connections, so this simple check prevents problems.
Monitor your hub’s performance through its app or web interface. Most hubs display diagnostic information including signal strength, data collection frequency, and error counts. If error counts increase significantly, this may indicate a failing clamp or cable that requires replacement. Modern hubs typically last 5 to 10 years with minimal maintenance.
Keep your hub’s firmware updated by checking the manufacturer’s website periodically. Firmware updates often improve accuracy, add features, and fix bugs. Most hubs support automatic updates, but you can also manually check for updates through the hub’s settings menu. Updated firmware ensures your system remains compatible with your smart home platform and benefits from the latest improvements.
How Can You Use Main Service Data to Reduce Energy Costs?
Real-time consumption data from main service sensors empowers you to make informed decisions that reduce utility costs. Start by establishing a baseline—monitor your consumption for 2 to 4 weeks without making changes. This reveals your typical daily and weekly patterns, identifies peak consumption times, and shows seasonal variations. Most homes consume significantly more energy during heating or cooling seasons, and this baseline data quantifies those differences.
Next, use the data to identify high-consumption periods and correlate them with specific activities. If consumption spikes at 6 PM every evening, this likely corresponds to dinner preparation, electric water heater operation, and HVAC cycling. Armed with this knowledge, you can shift discretionary loads—like dishwasher operation, laundry, or EV charging—to off-peak hours when utility rates are lower. Many utilities offer time-of-use (TOU) rate plans that charge significantly less during night hours or weekends. By automating dishwashers for off-peak hours, you can reduce your electricity costs by 10 to 20 percent without sacrificing comfort.
Main service data also reveals phantom loads and standby power waste. If your consumption remains elevated during hours when no one is home and major appliances are off, this indicates standby power phantom loads draining energy unnecessarily. Identifying these waste sources and eliminating them through smart power strips or appliance upgrades can save 5 to 15 percent of your total consumption.
For homeowners considering electric vehicle adoption or heat pump installation, main service data helps assess whether your current electrical service capacity is adequate. If your consumption regularly approaches your service amperage limit, you may need to avoid electrical panel upgrades through strategic load management rather than expensive infrastructure improvements. This data-driven approach saves thousands in unnecessary electrical work.
Frequently Asked Questions
Do I Need a Licensed Electrician to Install Main Service Sensors?
Most jurisdictions permit homeowners to install non-invasive CT clamp sensors without electrician involvement, as they don’t require direct contact with conductors or circuit modifications. However, verify your local electrical code before starting. Some areas have stricter requirements. If you’re uncomfortable working near electrical panels, hiring a professional is always the safest choice and typically costs $200 to $400.
What Is the Difference Between CT Clamps and Other Monitoring Methods?
CT clamps are non-invasive and don’t interrupt circuits, making them safe for DIY installation. Other methods like split-core transformers or inductive sensors work similarly but may require different installation approaches. CT clamps remain the industry standard because they’re reliable, affordable, and widely compatible with smart home platforms. They’re also the safest option for homeowner installation.
How Accurate Are CT Clamp Sensors for Energy Monitoring?
Quality CT clamps typically achieve 1 to 2 percent accuracy under normal operating conditions. This means a 10-kilowatt reading might vary by 100 to 200 watts. This level of precision is more than adequate for identifying consumption patterns and tracking efficiency improvements. Compare your readings against your utility meter to verify accuracy within your system.
Can I Install Sensors on a 400-Amp Service or Three-Phase System?
Yes, but you’ll need CT clamps rated for higher amperage. Most residential services are 100 to 200 amps, but commercial or large residential services may use 400-amp or three-phase service. Select CT clamps matching your service amperage and follow the same installation process. Three-phase systems require three clamps instead of two, with configuration adjusted accordingly.
What Happens If My CT Clamps Are Incorrectly Sized?
Undersized clamps (e.g., 100-amp clamps on 200-amp service) produce inaccurate readings that scale proportionally. A reading of 5 kilowatts might actually represent 10 kilowatts. Oversized clamps may not detect lower consumption levels accurately. Always verify your service amperage and purchase clamps matching that rating exactly. Check your main breaker for the amperage marking.
How Long Does Installation Typically Take?
Most homeowners complete installation in 30 to 60 minutes, including sensor placement, cable routing, hub connection, and initial configuration. First-time installers may require 60 to 90 minutes, especially if they’re unfamiliar with their electrical panel. Experienced installers working on familiar systems often finish in 20 to 30 minutes. The actual installation is straightforward; most time is spent on careful preparation and safety verification.
Is Installing Main Service Sensors Worth the Investment?
Installing sensors on your electrical service mains represents one of the highest-value smart home investments available in 2026. The combination of upfront cost (typically $150 to $400 for sensors and hub) and installation time (30 to 90 minutes) delivers benefits that compound over years. Homeowners typically recover the investment within 12 to 24 months through reduced utility costs achieved by shifting consumption to off-peak hours, eliminating phantom loads, and optimizing appliance operation based on real consumption data.
Beyond direct cost savings, main service sensors provide invaluable data for major home improvement decisions. If you’re considering electric vehicle adoption, heat pump installation, or other electrification projects, accurate consumption baselines prevent costly over-engineering and unnecessary electrical panel upgrades. The data also improves your ability to identify individual appliance signatures, enabling targeted efficiency improvements that reduce consumption and environmental impact.
For smart home enthusiasts, main service sensors are foundational infrastructure. They integrate seamlessly with modern platforms and enable sophisticated automations that optimize your home’s energy performance continuously. Combined with tracking energy use per appliance and other monitoring strategies, main service sensors create a comprehensive energy management system that evolves as your home and needs change.
The safety and reliability of modern CT clamp sensors have improved dramatically since earlier generations. Current products from established manufacturers offer excellent accuracy, long service life, and broad smart home platform compatibility. If you’re building a smart home or seeking better control over energy costs, installing main service sensors should be one of your first projects. The combination of relatively low cost, straightforward installation, and substantial long-term benefits makes this upgrade an excellent investment in both your home’s intelligence and your wallet.



Write Your Review
No reviews yet. Be the first to share your experience!