

What Is a DIY Home Energy Audit and How Does It Help You Save Money?
A DIY home energy audit is a systematic inspection of your home to identify where energy is being wasted and where you can improve efficiency. By conducting your own audit in 2026, you can pinpoint energy leaks around windows and doors, identify inefficient appliances, and discover phantom power loads consuming electricity when devices are off. The key takeaway is that most homeowners can reduce their energy bills by 10-30% simply by identifying and addressing these inefficiencies without hiring expensive professional auditors. A comprehensive audit examines heating and cooling systems, insulation levels, air leakage points, water heating efficiency, and appliance performance. You’ll gain a clear understanding of your home’s energy consumption patterns and receive actionable recommendations for improvements. This knowledge empowers you to make informed decisions about which upgrades will deliver the best return on investment, from simple weatherization projects to larger investments like HVAC system replacements or solar installation.

The importance of conducting a home energy audit has grown significantly in 2026 as energy costs continue to rise and homeowners increasingly seek ways to reduce their carbon footprint. According to the U.S. Department of Energy, a thorough energy audit is the first step toward making your home more efficient. Unlike professional audits that can cost $300-500, a DIY approach requires only basic tools and your time, making it an accessible starting point for any homeowner committed to energy conservation.
What Tools and Equipment Do You Need for a Home Energy Audit?
Conducting a successful DIY home energy audit in 2026 requires several essential tools that most homeowners either already own or can inexpensively acquire. The most important tool is a thermal imaging camera or infrared thermometer, which reveals heat loss through walls, windows, and doors by displaying temperature variations. While professional thermal cameras cost hundreds of dollars, budget-friendly infrared thermometers under $50 can effectively identify problem areas. You’ll also need a blower door test simulator—a simple plastic bag or smoke pencil that reveals air leakage when held near potential leak points like electrical outlets, window frames, and door seals.
Additional essential tools include a digital multimeter to test electrical circuits, a moisture meter to detect dampness in insulation or walls, and a flashlight with LED technology for inspecting attic and crawl spaces. A tape measure helps you calculate square footage and insulation thickness, while a notebook or smartphone app records your findings. Consider investing in an energy monitoring device like a kill-a-watt meter to measure individual appliance consumption. For a more advanced audit, smart home energy monitors can track real-time consumption across your entire home. You may want to reference our guide on how to track energy use per appliance in 2026 for detailed information on using monitoring devices effectively. Most of these tools cost under $200 total, making a DIY audit significantly more affordable than professional alternatives.
How Do You Systematically Inspect Your Home for Energy Waste?
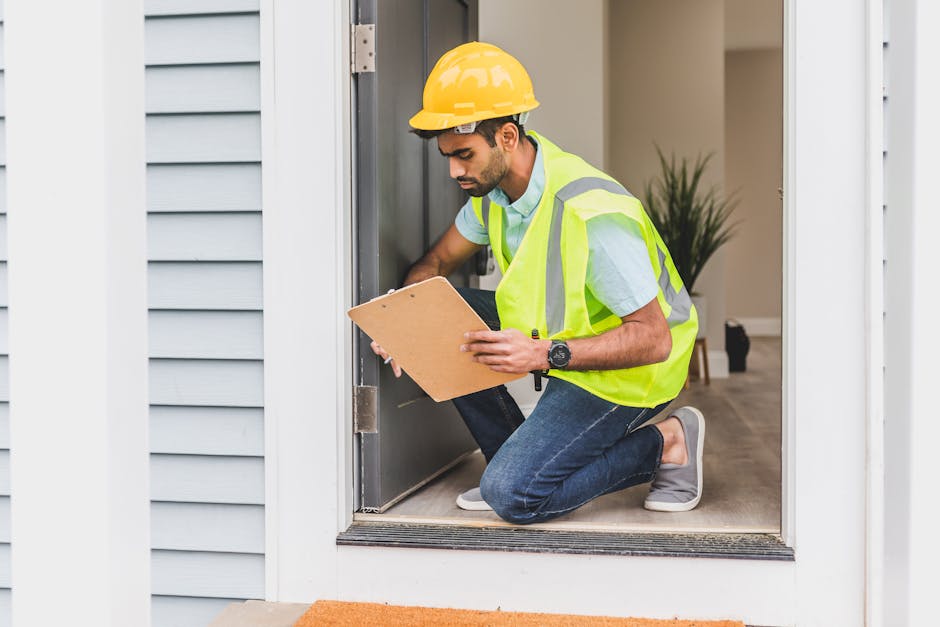
A systematic inspection is the foundation of an effective DIY home energy audit. Begin by examining your home’s exterior, looking for visible cracks in the foundation, gaps around utility penetrations, and deteriorated caulking around windows and doors. These air leaks are major sources of energy waste, allowing conditioned air to escape in winter and hot air to infiltrate in summer. Use a smoke pencil or incense stick held near potential leak points—the smoke will visibly drift toward leaks, clearly showing problem areas.
Attic Inspection: The attic is where most homes lose significant energy. Check insulation depth (aim for R-38 to R-60 depending on your climate zone) and look for gaps, compressed areas, or moisture damage. Verify that attic vents aren’t blocked and that soffit vents are clear. Poor attic ventilation can cause premature roof aging and excessive heat buildup.
Basement and Crawl Spaces: Inspect foundation walls for cracks, efflorescence (white mineral deposits indicating moisture), and gaps where pipes or electrical lines enter. Check if rim joists (the band of wood connecting foundation to first floor) are insulated and sealed. These areas significantly impact your home’s thermal envelope.
Windows and Doors: Test for air leakage by holding a candle flame near frames and seals. Look for broken seals in double-pane windows (indicated by condensation between panes), cracked glazing, or missing weatherstripping. Document the type and age of windows, as older single-pane windows are major efficiency culprits.
HVAC System: Check your furnace or heat pump age and condition. Visually inspect ductwork for leaks, gaps, or disconnections. A leaky duct system can waste 20-30% of conditioned air before it reaches living spaces. Replace or upgrade filters and verify that the system is properly sized for your home.
Water Heating: Check your water heater’s age, insulation, and temperature setting (optimal is 120°F). Inspect pipes for insulation and leaks. Consider whether your system is appropriately sized and efficient for your household’s hot water demands.
What Are Common Energy Waste Problems and How Do You Document Them?
Understanding common energy waste problems helps you recognize them during your audit. Air leakage is the most prevalent issue—the average home loses energy equivalent to leaving a window open year-round. Inadequate insulation, especially in attics and crawl spaces, ranks second. Many homes built before 2000 have insufficient insulation by today’s standards, resulting in excessive heating and cooling loads.
Phantom power loads—electricity consumed by devices in standby mode—account for 5-10% of residential energy use. Older appliances and HVAC systems operate far less efficiently than modern Energy Star models. Inefficient water heating, poor duct sealing, and thermal bridging (heat transfer through studs and framing) also contribute significantly to energy waste.
Documentation is crucial for tracking findings and prioritizing improvements. Create a spreadsheet or use a mobile app to record the location, severity, and estimated impact of each issue. Take photos of problem areas, note insulation R-values, record HVAC equipment specifications and age, and document window and door conditions. Assign each issue a priority level based on potential energy savings and cost to fix. This systematic documentation helps you create a realistic action plan and identify which improvements offer the best return on investment. You might also reference our guide on how to reduce standby power phantom loads in 2026 for specific strategies addressing this common waste source.
How Do You Use Energy Monitoring Data to Identify Inefficiencies?
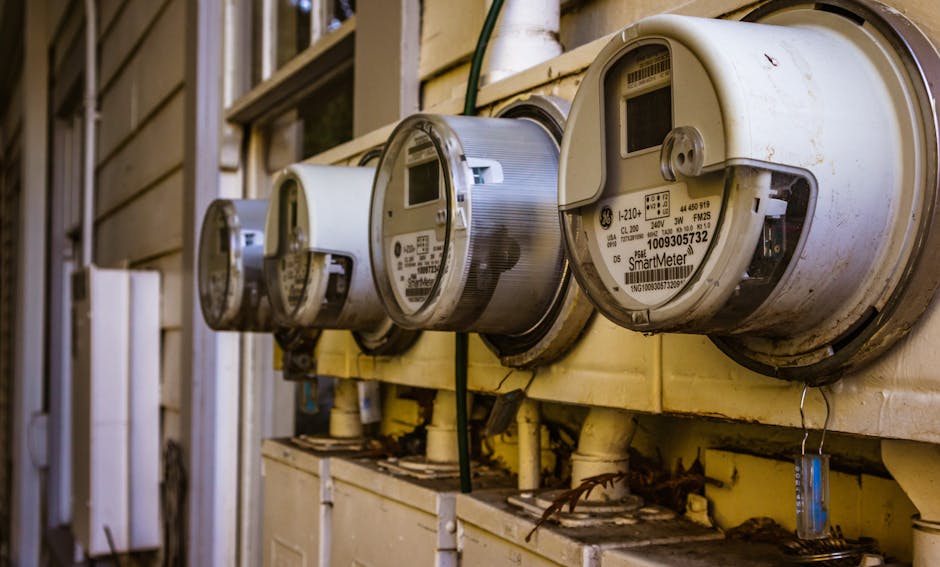
Modern energy monitoring technology provides detailed insights into your home’s consumption patterns. Smart meters and sub-metering systems allow you to track energy use in real-time, revealing which appliances and systems consume the most electricity. Begin by monitoring your total home energy consumption for 2-4 weeks to establish baseline usage patterns. Note when consumption peaks and correlate it with weather conditions, occupancy patterns, and specific appliance operation.
Individual appliance monitoring reveals which devices are energy hogs. A refrigerator running constantly, an inefficient water heater, or an aging air conditioner can each consume thousands of kilowatt-hours annually. By identifying these culprits, you can prioritize replacement or repair decisions. Smart plugs and energy monitors show real-time power draw, helping you understand consumption patterns and identify opportunities for behavioral changes or automation.
Compare your consumption against similar homes in your climate zone using EPA benchmarking tools or utility company data. If your usage is significantly higher, it indicates substantial inefficiency opportunities. Track consumption by time of use to identify peak demand periods and opportunities for shifting loads to off-peak hours when electricity rates are lower. This data-driven approach complements your physical inspection, providing quantitative evidence to support your improvement priorities.
How Do You Conduct a DIY Home Energy Audit Step-by-Step?
Follow this comprehensive step-by-step process to conduct a thorough DIY home energy audit in 2026:
Step 1: Prepare and Schedule Choose a clear day with mild temperatures for your audit. Avoid extremely hot or cold days when your HVAC system is running at maximum capacity, as this can mask efficiency issues. Gather all your tools, notebooks, camera, and measuring equipment. Plan to spend 4-8 hours depending on your home’s size and complexity.
Step 2: Collect Baseline Information Gather your last 12 months of utility bills to understand seasonal consumption patterns and identify trends. Note your home’s age, square footage, number of occupants, and climate zone. Document HVAC equipment type, age, and efficiency ratings. Record the age and type of windows, doors, insulation, and water heating systems. This historical context helps you interpret your findings accurately.
Step 3: Inspect the Exterior Walk around your home’s perimeter, looking for foundation cracks, gaps around utility penetrations, deteriorated caulking, and damaged siding. Check soffit vents, gutters, and downspouts. Inspect roof condition and note any missing shingles or flashing issues. Use an infrared thermometer to identify temperature variations indicating insulation problems or air leakage.
Step 4: Examine Attic and Upper Floors Access your attic safely and measure insulation depth in multiple locations. Check for gaps, compression, moisture, or pest damage. Verify attic ventilation and look for signs of heat damage or moisture problems. Inspect the upper floor ceiling for cracks, water stains, or other damage indicators.
Step 5: Evaluate Basement and Lower Levels Inspect foundation walls for cracks, efflorescence, or water intrusion signs. Check rim joists for insulation and air sealing. Look for gaps around pipes, electrical lines, and ductwork penetrations. Examine basement windows and doors for air leakage and proper sealing.
Step 6: Test Windows and Doors Conduct a smoke test at all window and door frames. Check for broken seals in double-pane windows, cracked glazing, and missing weatherstripping. Document the type, age, and condition of each window and door. Test doors for proper closure and seal integrity.
Step 7: Assess HVAC Systems Locate your furnace or heat pump and record the model, age, and efficiency rating. Inspect ductwork for visible leaks, gaps, and disconnections. Check filter condition and note when it was last changed. Verify thermostat type and functionality. Consider whether the system is appropriately sized for your home.
Step 8: Evaluate Water Heating Check your water heater type, age, and insulation. Measure the temperature setting and note any leaks or corrosion. Inspect hot water pipes for insulation. Evaluate whether your system is appropriately sized and efficient for household hot water demands.
Step 9: Monitor Energy Consumption Install energy monitoring devices on your main electrical panel and individual circuits or appliances. Track consumption for 2-4 weeks to establish baseline patterns. Identify peak usage times and specific appliances consuming significant energy. Correlate consumption with weather, occupancy, and behavioral patterns.
Step 10: Document and Analyze Findings Compile all observations, measurements, photos, and energy data into a comprehensive report. Categorize issues by severity and potential impact. Estimate energy savings for each improvement based on industry standards or utility company data. Prioritize improvements by considering both energy savings potential and cost to implement.
Step 11: Create an Action Plan Develop a prioritized list of improvements, starting with low-cost, high-impact changes like weatherization and phantom load reduction. Progress to medium-cost improvements like insulation upgrades and HVAC maintenance. Finally, consider major investments like system replacements or solar installation. Estimate costs and payback periods for each improvement.
Step 12: Implement and Monitor Begin with your highest-priority improvements. Track energy consumption before and after each change to quantify savings. Adjust your action plan based on actual results. Consider professional assessment for complex issues like duct sealing or HVAC system replacement.
What Practical Improvements Should You Prioritize Based on Your Audit Findings?
Based on your audit findings, prioritize improvements using a cost-benefit analysis approach. Immediate, Low-Cost Actions should be your first focus. Seal air leaks around windows, doors, electrical outlets, and penetrations using weatherstripping and caulk—typical costs under $100 with 10-15% energy savings potential. Add insulation to attic access hatches and basement rim joists. Reduce phantom loads by unplugging devices or using smart power strips. Adjust water heater temperature to 120°F and insulate hot water pipes.
Medium-Cost Improvements offer substantial savings with reasonable payback periods. Upgrade to Energy Star appliances when current units fail—refrigerators, water heaters, and HVAC systems typically pay for themselves through energy savings within 5-10 years. Add attic insulation to recommended R-values for your climate zone—costs $1-2 per square foot with 15-20% heating and cooling savings. Seal and insulate ductwork to prevent conditioned air loss. Replace old single-pane windows with modern, efficient models.
Major Investments require careful analysis but can dramatically improve efficiency. HVAC system replacement with high-efficiency models offers 20-40% energy savings. Whole-home insulation upgrades address thermal envelope weaknesses. Solar installation maximizes long-term savings and energy independence. Before committing to major investments, obtain multiple quotes and verify expected payback periods based on your local utility rates and climate.
Consider automation and smart home technologies to optimize energy use. Our guides on how to set up automated lighting schedules in 2026 and how to automate dishwashers for off-peak hours in 2026 provide strategies for reducing consumption through intelligent scheduling and load shifting.
How Do You Identify Individual Appliance Signatures and Energy Consumption Patterns?
Understanding individual appliance energy consumption helps you identify which devices warrant replacement or behavioral changes. Each appliance has a unique “signature”—a distinctive power consumption pattern that allows you to recognize its operation in whole-home energy data. Refrigerators show constant baseline consumption with periodic compressor cycling. Water heaters display sharp spikes when heating water. HVAC systems show variable consumption based on temperature and thermostat settings.
To identify appliance signatures, monitor individual devices using smart plugs or kill-a-watt meters. Record power consumption at different operating modes—standby, partial load, and full operation. Note consumption duration and frequency. For example, a dishwasher might consume 1.8 kW during the wash cycle for 2 hours, while a refrigerator continuously consumes 0.15 kW with periodic 0.5 kW spikes when the compressor runs.
Compare individual appliance consumption against Energy Star benchmarks for similar models and sizes. If your refrigerator consumes significantly more than comparable modern models, replacement may be justified. Washing machines, dryers, and water heaters often show substantial efficiency improvements in newer models. Understanding these patterns also reveals opportunities for behavioral optimization—running dishwashers and laundry during off-peak hours reduces demand charges and shifts consumption to cleaner energy sources. For detailed guidance, see our article on how to identify individual appliance signatures in 2026.
What Role Does Weather and Climate Play in Your Audit Results?
Weather and climate significantly influence audit findings and energy consumption patterns. Seasonal variations affect heating and cooling loads, making it important to conduct audits during multiple seasons or to normalize data for weather differences. A home audited in mild spring weather may show lower consumption than the same home audited in extreme summer or winter conditions, potentially masking efficiency issues.
Your climate zone determines appropriate insulation R-values, window types, and HVAC system specifications. The U.S. Department of Energy defines eight climate zones, each with different efficiency recommendations. A home in a cold climate (zones 5-8) requires higher insulation levels and more robust heating systems than a warm climate home (zones 1-2). When evaluating your audit findings, ensure recommendations align with your specific climate zone.
Weather normalization helps you compare consumption across seasons and years. If one winter was unusually cold, your heating consumption will be higher than normal. Conversely, an exceptionally mild winter masks heating efficiency problems. Utility companies often provide weather-normalized consumption data that accounts for these variations. When analyzing your audit findings, consider whether weather was typical, unusually extreme, or mild, and adjust your expectations accordingly.
Frequently Asked Questions
How long does a DIY home energy audit typically take?
A comprehensive DIY home energy audit typically requires 4-8 hours depending on your home’s size, complexity, and how thoroughly you document findings. Smaller homes or simpler audits may take 2-3 hours, while larger homes with detailed monitoring and analysis might require 10-12 hours spread across multiple days. Professional audits often take similar timeframes but include specialized equipment like blower doors and thermal imaging.
What is the average cost of conducting a DIY home energy audit in 2026?
A basic DIY audit costs $50-200 for essential tools like an infrared thermometer, smoke pencils, and measuring equipment. A more comprehensive audit with energy monitoring devices might cost $200-500. This is significantly less than professional audits, which typically cost $300-500 but may include specialized testing like blower door tests and thermal imaging that DIY audits cannot replicate.
Can a DIY energy audit replace a professional audit?
A DIY audit provides valuable insights and identifies obvious efficiency problems, but cannot fully replace professional assessments. Professionals use specialized equipment like blower doors (measure air leakage rates), thermal imaging cameras, and duct leakage testers that reveal issues DIY methods cannot detect. However, a thorough DIY audit combined with professional assessment of complex systems offers the best results.
How much money can you save from implementing energy audit recommendations?
Energy savings vary widely based on your home’s current efficiency, local utility rates, and which improvements you implement. Most homeowners save 10-30% on energy bills through comprehensive improvements identified in audits. Low-cost weatherization typically saves 5-15%, while major upgrades like HVAC replacement or insulation improvements can save 20-40%. Payback periods range from 1-2 years for simple improvements to 10-15 years for major investments.
What is the best time of year to conduct a home energy audit?
Spring or fall offer ideal conditions for energy audits—mild temperatures prevent HVAC systems from running at maximum capacity, which can mask efficiency issues. Avoid extremely hot or cold weather when heating or cooling systems dominate consumption patterns. However, conducting audits during multiple seasons provides more comprehensive understanding of year-round efficiency and seasonal variations.
Should you hire a professional for specific audit components?
Consider professional assessment for complex systems like ductwork sealing, HVAC evaluation, and blower door testing. Professionals can quantify air leakage rates and identify hidden problems your DIY inspection might miss. For major improvements like insulation upgrades or HVAC replacement, professional quotes ensure accurate cost estimates and proper installation. A hybrid approach—DIY inspection combined with professional assessment of complex systems—offers excellent value.
Is Conducting a DIY Home Energy Audit in 2026 Worth Your Time and Effort?
Conducting a DIY home energy audit in 2026 is absolutely worth the investment of your time and effort. The process typically requires only 4-8 hours and costs under $200 for essential tools, yet provides insights that can reduce your energy bills by 10-30% and improve home comfort significantly. Unlike professional audits costing $300-500, a DIY approach is accessible to any homeowner committed to understanding and improving their home’s efficiency.
Beyond financial savings, an energy audit empowers you to make informed decisions about home improvements. Instead of guessing which upgrades will deliver the best returns, your audit identifies specific problems and quantifies their impact. This knowledge helps you prioritize improvements strategically, starting with low-cost, high-impact changes and progressing to larger investments only when justified by energy savings potential and cost analysis.
The environmental benefits are equally compelling. Reducing your home’s energy consumption lowers your carbon footprint and decreases demand on electrical grids, supporting the transition to renewable energy. In 2026, as climate concerns intensify and energy costs continue rising, the timing for conducting a home energy audit has never been better. Start with a basic audit to identify obvious inefficiencies, then consider professional assessment for complex systems. Track your progress by monitoring energy consumption before and after implementing improvements. Our related guides on how to track carbon footprint on energy app in 2026 and how to maximize self-consumption of solar energy in 2026 provide complementary strategies for optimizing your home’s energy performance and environmental impact. Whether you’re motivated by cost savings, environmental responsibility, or home comfort improvements, a DIY energy audit is the essential first step toward achieving your efficiency goals.









Write Your Review
No reviews yet. Be the first to share your experience!