

How Can You Set Up Automated Lighting Schedules in Your Home?
Setting up automated lighting schedules involves configuring smart bulbs or switches to turn on and off at predetermined times using a central hub, app, or voice assistant. The key takeaway is that modern smart lighting systems in 2026 offer multiple setup methods—from simple app-based scheduling to advanced automation routines triggered by sensors, time, or location. Most systems take 15-30 minutes to configure once devices are connected to your network. Automated lighting schedules save energy by eliminating forgotten lights, enhance home security by simulating occupancy when you’re away, and improve convenience through hands-free control. Whether you’re using Z-Wave, Zigbee, Wi-Fi, or Thread-based devices, the fundamental process remains consistent: connect your smart lights to a hub or app, create automation rules, and set your desired schedule. In May 2026, popular platforms like Home Assistant, Apple HomeKit, Google Home, and Amazon Alexa all support sophisticated scheduling with conditional logic, meaning you can create rules like “turn lights on at sunset if no one is home” or “dim lights gradually 30 minutes before bedtime.”
What Are the Different Methods for Creating Lighting Automation?
In 2026, you have several approaches to automate your lighting, each with distinct advantages and complexity levels. Understanding these methods helps you choose the best fit for your smart home setup.
Time-Based Scheduling
Time-based scheduling is the simplest method, where lights turn on and off at fixed times each day. This approach works well for establishing consistent routines—for example, turning bedroom lights on at 7:00 AM and off at 11:00 PM. Most smart lighting apps offer intuitive interfaces where you select the device, time, and action. You can typically set different schedules for weekdays and weekends. The limitation is that time-based schedules don’t adapt to seasonal changes or your actual presence in the home. For example, if you set lights to turn on at 6:00 PM year-round, they’ll activate in daylight during summer months, wasting energy.
Sunset and Sunrise Triggers
Sun-based automation adjusts to natural daylight throughout the year, making it more energy-efficient than fixed times. Your smart home hub calculates sunset and sunrise times based on your geographic location and triggers lighting accordingly. You can set lights to activate 30 minutes before sunset or turn off 15 minutes after sunrise. This method is ideal for outdoor lighting, security lighting, and maintaining natural circadian rhythms indoors. Most platforms including Home Assistant and native apps support this feature natively.
Sensor-Based Automation
Motion sensors, occupancy sensors, and door sensors trigger lighting based on activity rather than time. When motion is detected, lights activate; when no motion is detected for a set duration (typically 5-15 minutes), lights turn off. This method maximizes energy savings in rooms used intermittently like bathrooms, laundry rooms, and hallways. Occupancy sensors are more sophisticated than motion sensors—they detect presence even without movement, using heat or other indicators. Combining sensors with time-based rules creates intelligent logic: “Turn on lights if motion is detected AND it’s after sunset.”
Geofencing and Location-Based Triggers
Geofencing uses your smartphone’s location to trigger automation when you arrive home or leave. For example, lights can turn on gradually as you approach your home, or activate security lighting when everyone leaves. This requires your phone to have location services enabled and connected to your home network. Geofencing adds convenience and security but uses more battery power on mobile devices. It’s most effective when combined with other triggers to avoid false activations from neighbors’ properties.
Why Should You Implement Automated Lighting Schedules?
Automated lighting schedules deliver multiple benefits beyond simple convenience. Understanding these advantages helps justify the initial setup investment and encourages consistent use of automation features.
Energy Efficiency and Cost Savings
Forgotten lights are a major source of residential energy waste. According to the U.S. Department of Energy, lighting accounts for approximately 10-15% of residential electricity use. Automated schedules eliminate this waste by ensuring lights turn off automatically. Smart bulbs also consume significantly less energy than traditional incandescent or halogen fixtures. Over a year, automated lighting can reduce electricity bills by 10-20% depending on your current habits. When combined with energy monitoring tools like those described in our guide on how to track energy use per appliance, you can measure exact savings and optimize schedules further.
Home Security and Deterrence
Automated lighting simulates occupancy when you’re away, deterring burglars who target homes appearing empty. Randomized schedules—where lights turn on and off at varying times—are more effective than fixed schedules. Some systems support “away mode” that randomly activates lights throughout the home. Outdoor lighting automation also improves security by illuminating entry points and deterring trespassing. When combined with door sensors and motion detection, lighting becomes part of a comprehensive security system.
Circadian Rhythm Support
Scheduling lights to follow natural sunrise and sunset patterns supports your body’s circadian rhythm, improving sleep quality and daytime alertness. Morning light exposure signals your body to wake, while evening dimming triggers melatonin production. Advanced systems offer color temperature scheduling, gradually shifting from cool blue light during the day to warm amber light in the evening. This aligns with recommendations from sleep research institutions for maintaining healthy sleep-wake cycles.
Convenience and Lifestyle Enhancement
Automated lighting eliminates the need to manually control switches, particularly useful for people with mobility limitations, elderly residents, or those managing multiple rooms. Voice commands combined with schedules offer hands-free control. Scenes and routines let you activate multiple lights simultaneously with one command—for example, “Movie mode” dims all lights and closes blinds instantly.
How Do You Set Up Automated Lighting Schedules Step-by-Step?
Follow this comprehensive process to configure automated lighting in your smart home during 2026. The exact steps vary slightly depending on your platform, but the fundamental workflow remains consistent across systems.
Step 1: Verify Device Compatibility and Connection
Before creating automations, ensure all smart lights or switches are properly connected to your network and appear in your hub or app. Check that devices respond to manual commands—if a light won’t turn on from the app, automation won’t work either. Verify your hub has internet connectivity and is running the latest firmware. For Z-Wave or Zigbee devices, confirm they’re properly paired to your hub. For Wi-Fi devices, ensure they’re connected to your 2.4GHz network (most smart home devices don’t support 5GHz). Test each device individually by controlling it manually through the app before creating automations.
Step 2: Choose Your Automation Platform
Select whether you’ll use your device manufacturer’s native app (like Philips Hue app or LIFX app), a central hub platform (Home Assistant, SmartThings), or a voice assistant ecosystem (Google Home, Alexa, Apple HomeKit). Native apps offer simplicity but limited integration with other brands. Central hubs like Home Assistant provide maximum flexibility and local control but require more technical knowledge. Voice assistants offer convenience and broad device support but may depend on cloud connectivity. For 2026, Home Assistant remains the most powerful open-source option, while Apple HomeKit offers the strongest privacy features. Consider your technical comfort level and whether you want local-only automation or cloud-based features.
Step 3: Create Your First Automation Rule
In your chosen platform, navigate to the automation or routines section. Select “Create New Automation” or “Add Routine.” Choose your trigger—this could be a specific time (6:00 PM), a sun event (sunset), or a sensor activation. Then select your action: which light to control, what state it should enter (on/off), brightness level, and color if applicable. Name your automation something descriptive like “Evening Living Room Lights” rather than “Automation 1.” Set the days this automation should run (daily, weekdays only, weekends only). Save and test by manually triggering the condition or waiting for the scheduled time.
Step 4: Add Conditions for Smarter Automation
Conditions make automations intelligent by adding “if” statements. For example: “Turn on bedroom lights at sunset IF I’m home AND it’s not already on.” Common conditions include time ranges, location (geofencing), device states, and sensor readings. Conditions prevent unnecessary actions—for instance, preventing outdoor lights from turning on during the day even if motion is detected. Start with simple automations using only one or two conditions, then gradually add complexity as you become comfortable.
Step 5: Test and Refine Your Schedule
Run your automation through a complete cycle to verify it works as intended. For time-based automations, manually trigger the time to test without waiting. For sensor-based automations, walk through the detection area to confirm activation. Check that lights reach the correct brightness and color. Adjust timing if lights activate too early or stay on too long. Most people refine their schedules over 2-4 weeks as they identify what works best for their lifestyle. Document your automations in a spreadsheet noting the trigger, action, and purpose—this helps troubleshoot issues later.
Step 6: Create Complex Scenes and Routines
Once basic automations work, combine multiple lights and actions into scenes. A “Good Night” scene might dim all lights to 10%, close blinds, and lock doors simultaneously. A “Movie Time” scene could dim living room lights, turn off kitchen lights, and activate bias lighting behind the TV. Scenes can be triggered by automations, voice commands, or manual buttons. This layered approach—automations triggering scenes—creates sophisticated behavior without overwhelming complexity.
Common Mistakes to Avoid
Don’t set automations that conflict with each other—for example, one automation turning lights on at 6:00 PM while another turns them off at 6:05 PM creates flickering. Avoid overly sensitive motion sensors that activate lights during sleep when you turn over in bed. Don’t forget to disable automations during times you want manual control—some systems require creating “exceptions” or manually pausing automations. Don’t rely solely on geofencing for security lighting, as GPS can be unreliable; combine it with time-based or sun-based triggers. Avoid setting identical schedules for all rooms; bedrooms need different timing than living areas.
What Are the Best Practices for Efficient Automated Lighting?
Implementing these best practices maximizes energy savings and system reliability while minimizing frustration from poorly-timed automations.
Use Brightness Scheduling
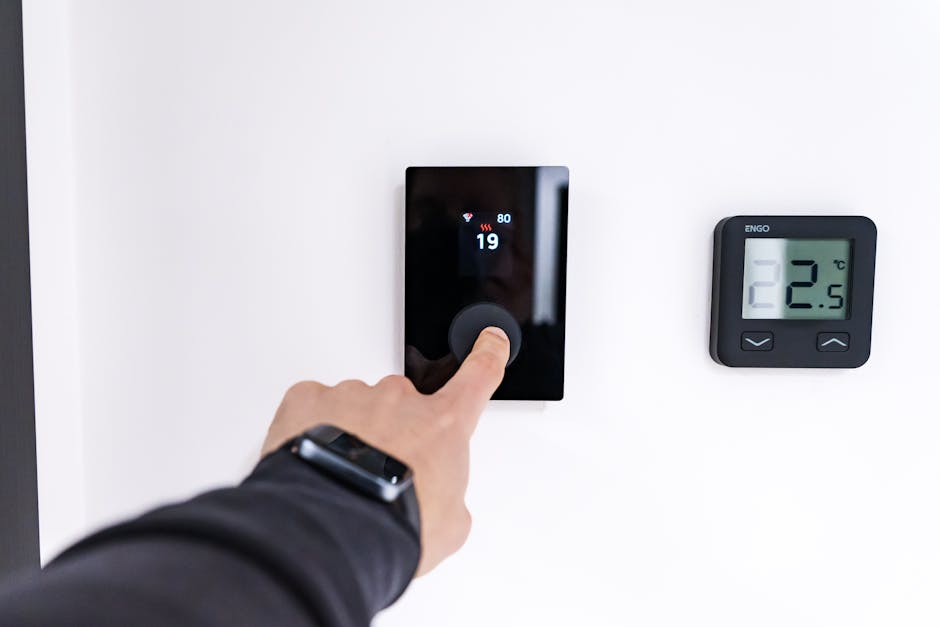
Rather than simply turning lights on and off, schedule brightness levels. Lights at 30% brightness often provide sufficient illumination while using a fraction of energy. Morning routines might gradually increase brightness to help you wake, while evening routines gradually dim to support sleep. Smart bulbs supporting this feature allow creating smooth transitions rather than abrupt on-off cycles. Brightness scheduling is particularly effective in hallways, bathrooms, and bedrooms where full brightness isn’t always necessary.
Implement Color Temperature Scheduling
Schedule color temperature shifts to support circadian rhythms: cool white (5000K) during morning and afternoon, transitioning to warm white (2700K) in the evening. This aligns with natural light color changes throughout the day. Many smart bulbs support this feature natively or through apps. Research from sleep science institutions shows that warm evening light improves sleep quality compared to cool white light.
Combine Multiple Triggers
Use “OR” logic to trigger lights through multiple pathways. For example: “Turn on hallway lights if motion is detected OR if it’s after sunset AND before sunrise.” This ensures lights activate under various conditions without creating conflicts. Similarly, use “AND” logic for conditions: “Turn on outdoor lights if motion is detected AND it’s after sunset.” Layering triggers creates robust automation that handles unexpected situations.
Create Occupancy Profiles
Develop different automation schedules for different days or seasons. Weekday schedules might activate lights early for work commutes, while weekend schedules allow later activation. Summer schedules can use later sunset times, while winter schedules account for early darkness. Some platforms support seasonal profiles that automatically adjust based on the current date. This prevents manual schedule updates and ensures automations remain relevant year-round.
Monitor and Optimize Energy Usage
Track actual energy consumption from your lighting automation to verify savings. Tools described in our guide on how to identify individual appliance signatures help measure per-device energy use. If energy savings are lower than expected, review your automations for inefficiencies. Perhaps motion sensors activate lights too frequently, or brightness levels are higher than necessary. Quarterly reviews of your automation schedules help identify optimization opportunities.
Maintain Backup Manual Control
Always ensure manual override capability. Guests, family members, or unexpected situations may require manual light control. Ensure wall switches or voice commands can override automations. Some systems support “temporary overrides” that allow manual control until the next scheduled automation. This prevents frustration when automations don’t match immediate needs.
How Do You Troubleshoot Common Automated Lighting Problems?
Even well-configured automations occasionally encounter issues. Understanding common problems and solutions helps resolve them quickly.
Lights Not Triggering at Scheduled Times
If automations fail to activate, first verify your hub has internet connectivity and latest firmware. Check that the specific light is responding to manual commands through the app. Review the automation settings to confirm the trigger time is correct and the automation is enabled. Some systems require explicitly saving changes; verify you’ve saved your automation. Check system logs for error messages. If using geofencing, verify location services are enabled on your phone and the app has location permission. If using sun-based triggers, confirm your hub’s location is set correctly in settings.
Automations Triggering at Wrong Times
Time zone mismatches cause automations to trigger at unexpected times. Verify your hub’s time zone matches your actual location in system settings. For sun-based automations, confirm your geographic location is accurate—even small differences affect sunset times. If using multiple hubs, ensure they’re all set to the same time zone. Some systems sync time automatically via internet; verify this feature is enabled.
Motion Sensor False Activations
Motion sensors activating lights unnecessarily waste energy and indicate sensitivity issues. Reduce sensor sensitivity if your system supports adjustment. Increase the required motion duration—some sensors activate on brief movements; requiring sustained motion (5+ seconds) filters out pets and passing shadows. Adjust the timeout delay—how long after motion stops before lights turn off. If a sensor consistently fails, verify it’s not blocked by furniture or curtains and that it’s within the hub’s wireless range.
Geofencing Not Working Reliably
GPS-based geofencing sometimes activates prematurely or fails to trigger. Expand the geofence radius from the default 100 meters to 200-300 meters to account for GPS accuracy variance. Ensure location services are always enabled on your phone, not just when the app is open. Some platforms require specific app permissions; check that location permission is set to “Always” rather than “While Using App.” Consider combining geofencing with time-based or sun-based triggers for redundancy.
Frequently Asked Questions
What is the easiest platform for setting up automated lighting schedules as a beginner?
Google Home and Amazon Alexa offer the simplest setup for beginners, with straightforward app interfaces and voice command integration. Native manufacturer apps like Philips Hue are also beginner-friendly but limit cross-brand automation. If you want more advanced features, Home Assistant has a steeper learning curve but provides powerful capabilities. Start with your existing ecosystem—if you own an Amazon Echo, use Alexa; if you have an Apple device, use HomeKit.
Can I set up automated lighting without a smart home hub?
Yes, Wi-Fi-connected smart bulbs and switches can work with their native apps without a hub. However, hubs enable more reliable local automation, faster response times, and continued function if your internet goes down. Hubs also allow automations to trigger when you’re not home, whereas app-only setups may depend on cloud connectivity. For serious automation, a hub is highly recommended. Many hub options exist at various price points in 2026.
How much energy can automated lighting actually save?
Energy savings typically range from 10-30% depending on your current habits and automation sophistication. If you frequently forget lights on, savings approach the higher end. Combining automation with efficient LED bulbs and smart scheduling maximizes savings. Track your baseline energy use before automation, then measure again after 3-6 months to quantify actual savings for your home.
Is it safe to use geofencing for home security automation?
Geofencing alone is not reliable enough for security, as GPS accuracy varies. However, combining geofencing with time-based and sun-based triggers creates redundancy. Don’t rely solely on geofencing to control security lighting; use it as one component of a layered approach. Ensure your phone’s location data is kept private and that you trust your automation platform with location information.
Can I schedule different lighting for weekdays versus weekends?
Yes, virtually all modern smart home platforms support day-of-week scheduling. When creating an automation, select which days it should run—options typically include “Every Day,” “Weekdays,” “Weekends,” or specific days. You can create multiple automations with the same light but different schedules, or most platforms let you select multiple days within a single automation rule.
What smart bulbs or switches work best for automated scheduling in 2026?
Popular options include Philips Hue (excellent reliability), LIFX (no hub required), Lutron Caseta (hardwired reliability), and Wyze (budget-friendly). Choose based on your hub platform—Z-Wave devices work with Z-Wave hubs, Zigbee with Zigbee hubs, Wi-Fi devices with internet-connected hubs. For maximum flexibility, select devices compatible with Home Assistant, which supports virtually all protocols and brands.
Is Setting Up Automated Lighting Schedules Worth the Effort?
Setting up automated lighting schedules in 2026 is absolutely worth the effort for most homeowners. The initial 2-4 hours of setup time yields years of convenience, energy savings, and security benefits. Energy savings alone typically pay for smart bulbs and hubs within 1-2 years, after which savings are pure profit. Beyond financial benefits, automation improves daily quality of life by eliminating forgotten lights, supporting better sleep through circadian-aligned lighting, and providing peace of mind through simulated occupancy when away.
The technology has matured significantly since earlier smart home adoption, with reliable platforms, intuitive apps, and affordable devices now available. Starting small with simple time-based automations helps you learn the system without overwhelming complexity. As you become comfortable, gradually add sensor-based triggers, geofencing, and scene-based routines to unlock full automation potential.
For maximum results, combine lighting automation with complementary smart home features. Consider monitoring energy consumption as described in our guide on how to reduce standby power phantom loads to identify other efficiency opportunities. If you’re interested in broader home energy management, explore automating appliances for off-peak hours to maximize savings across your entire home.
Whether you’re motivated by energy savings, security, convenience, or health benefits, automated lighting schedules represent one of the most practical smart home investments. The learning curve is minimal, the payoff is substantial, and the technology continues improving. Start implementing automated lighting schedules today to begin enjoying the benefits immediately.







Write Your Review
No reviews yet. Be the first to share your experience!