

How Can You Install a Smart Thermostat Without a C-Wire?
Installing a smart thermostat without a C-wire (common wire) is entirely possible in 2026 using several proven methods that provide continuous power to your device. The most effective solution involves using a power extender kit, which creates a virtual C-wire by bridging your heating and cooling circuits. Alternative methods include installing a dedicated C-wire from your HVAC system, using a transformer, or selecting a thermostat with built-in battery backup capabilities. Most modern smart thermostats like Nest, Ecobee, and Honeywell now offer C-wire alternatives, making installation accessible for homes with older wiring configurations. The key is understanding your HVAC system’s wiring, selecting compatible equipment, and following proper installation protocols. With the right approach, you can upgrade to a smart thermostat and enjoy energy savings of 10-15% annually while gaining remote temperature control and learning capabilities. This guide walks you through every method available in 2026, ensuring you choose the best solution for your specific heating and cooling setup.
What Is a C-Wire and Why Do Smart Thermostats Need It?
A C-wire, or common wire, is a dedicated 24-volt power line that runs from your HVAC system’s transformer to your thermostat. It provides continuous electrical power to keep smart thermostats operational even when heating or cooling cycles aren’t actively running. Traditional thermostats require minimal power and function with just two or three wires, but smart thermostats with Wi-Fi connectivity, touchscreens, and learning algorithms demand constant power to maintain their features.
Without a C-wire, your smart thermostat must rely on brief power pulses from heating or cooling calls, which is insufficient for modern functionality. According to Ecobee’s technical documentation, approximately 45% of homes built before 2000 lack a dedicated C-wire, making this a common installation challenge. The absence of continuous power can cause your thermostat to lose connectivity, drain batteries rapidly, or fail to update firmware. Understanding this fundamental requirement helps you select the right installation method and avoid compatibility issues that could compromise your smart home investment.
Why Older Homes Often Lack C-Wires
Homes built before the 1990s typically have minimal thermostat wiring because conventional mechanical thermostats required only heating and cooling signals. When HVAC systems were upgraded over the decades, contractors often didn’t add C-wires unless necessary. This legacy wiring remains common in millions of homes today, making C-wire-free installation methods essential for widespread smart thermostat adoption.
What Are the Best Power Solutions for Thermostats Without C-Wires?
Five primary methods enable smart thermostat installation without existing C-wires. Each solution addresses the power challenge differently, with varying costs, complexity levels, and compatibility requirements. Understanding these options helps you select the most practical approach for your specific HVAC configuration and skill level.
Power Extender Kits (Easiest Solution)
Power extender kits, also called “C-wire simulators” or “common makers,” are the most popular no-wire solution in 2026. These devices bridge your heating and cooling circuits to create a virtual C-wire without running new physical wiring. The kit typically includes a small box that installs at your furnace or air handler and a corresponding module at your thermostat. When your heating or cooling system isn’t actively running, the power extender kit maintains a trickle charge to your thermostat, keeping it powered continuously.
Installation involves connecting the extender kit to your existing thermostat wires at the furnace and thermostat locations—a 30-minute process requiring only basic electrical knowledge. Most major thermostat manufacturers including Google Nest, Ecobee, and Honeywell officially support power extender kits. The cost ranges from $60-$150, making it significantly cheaper than hiring an electrician to run new wiring. However, power extender kits work best with heat pump systems or homes with both heating and cooling capabilities, as they require both circuits to function properly.
Running a New C-Wire (Most Reliable)
Installing a dedicated C-wire from your furnace transformer to your thermostat provides the most robust power solution and is recommended by HVAC professionals nationwide. This method involves running 18-gauge or 20-gauge wire through your walls, attic, or basement from the transformer to the thermostat location. While more labor-intensive than other options, a new C-wire eliminates power-related issues permanently and ensures maximum thermostat reliability.
The installation process requires identifying your furnace location, planning the wire route, running the wire through existing conduits or drilling new holes, and making proper connections at both ends. For most homeowners, this 2-4 hour project costs $200-$400 in materials and labor if self-installed, or $500-$1,500 if hiring a professional electrician. The investment pays dividends through decades of reliable smart thermostat operation without power concerns.
Battery-Powered Thermostats
Several smart thermostat models in 2026 feature advanced battery systems that eliminate C-wire requirements entirely. These devices use rechargeable lithium batteries that charge during heating and cooling cycles, providing weeks or months of operation between charges. Battery-powered thermostats work independently of your HVAC wiring, though they still require connection to your heating and cooling circuits for system control.
The advantage of battery-powered models is absolute installation simplicity—no additional wiring or equipment needed beyond your existing thermostat connections. The disadvantage is occasional battery maintenance and potential power loss during extended periods without heating or cooling activity. These thermostats suit homes in mild climates with moderate HVAC usage but may disappoint users in extreme climates with heavy seasonal demands.
Transformer Upgrade
If your furnace’s transformer lacks sufficient power output, upgrading to a higher-capacity transformer can provide dedicated C-wire power. Standard furnace transformers output 24 volts at 40-60 volt-amperes (VA), while some smart thermostats require 75+ VA. A transformer upgrade costs $150-$300 and requires professional installation, making it a viable option if your existing transformer is undersized and a C-wire cannot be run.
Hybrid Wiring Solutions
Some installations combine multiple methods for optimal reliability. For example, you might install a power extender kit as your primary solution while adding battery backup to your thermostat for redundancy. This hybrid approach ensures your smart thermostat maintains power even if one system fails, providing maximum uptime and reliability for homes where temperature control is critical.
How Do You Install a Smart Thermostat Without a C-Wire Step-by-Step?
The installation process varies depending on your chosen power solution, but the fundamental steps remain consistent. This comprehensive guide covers the most common scenario: installing a smart thermostat using a power extender kit, which represents the easiest and most affordable option for most homeowners in 2026.
Step 1: Assess Your HVAC System and Existing Wiring
Before purchasing any equipment, photograph your current thermostat and furnace wiring. Turn off power to your HVAC system at the breaker, then remove your existing thermostat cover. Note which wires connect to which terminals—typically labeled R (red, power), W (white, heating), Y (yellow, cooling), and G (green, fan). Take a clear photo showing all wire connections and terminal labels. At your furnace, locate the transformer and identify the R, W, Y, and G terminals there as well.
This assessment determines whether a power extender kit will work for your system. Power extender kits require both heating (W) and cooling (Y) wires to create a virtual C-wire. If your system lacks both—such as heat-only furnaces or cooling-only air conditioning units—you’ll need an alternative solution like running a dedicated C-wire or choosing a battery-powered thermostat.
Step 2: Select Compatible Equipment
Choose a smart thermostat compatible with your HVAC system and power solution. Verify compatibility on the manufacturer’s website by entering your heating and cooling system type. Download the installation guide for your specific thermostat model, as connection procedures vary. If using a power extender kit, confirm the kit supports your thermostat brand and model—most major manufacturers including Ecobee, Nest, and Honeywell maintain compatibility lists on their support pages.
Purchase all necessary components: your smart thermostat, power extender kit (if applicable), wire strippers, a non-contact voltage tester, and potentially a fish tape for running wires through walls. Quality tools prevent installation errors and ensure safety when working with electrical systems. Budget $300-$600 for a complete DIY installation with all equipment included.
Step 3: Turn Off Power and Disconnect Your Old Thermostat
Safety is paramount when working with HVAC electrical systems. Locate your furnace breaker and switch it to the OFF position. Wait five minutes to ensure all power dissipates. Use your non-contact voltage tester to confirm no power reaches the thermostat wires—this prevents electrical shock and equipment damage.
Carefully disconnect each wire from your old thermostat, labeling them with tape showing their original terminal position (R, W, Y, G). Gently pull the wires back through the wall opening to prevent them from getting stuck. If you’re keeping your old thermostat as a backup, photograph its connections before removal.
Step 4: Install the Power Extender Kit at the Furnace
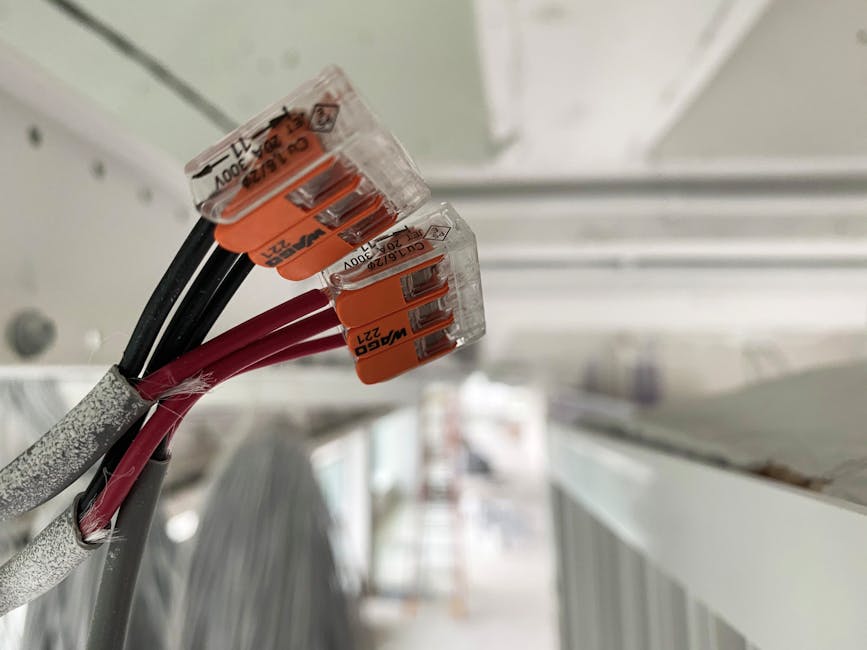
Open your furnace access panel and locate the transformer—a small box with colored wire connections. Identify the R, W, Y, and G terminals on the transformer. The power extender kit includes a small relay module that connects to these terminals. Following the kit’s instruction manual precisely, connect the extender kit’s wires to the appropriate transformer terminals. Most kits require connections to R (power), W (heating), and Y (cooling) terminals.
Secure the extender kit module to the furnace frame using provided mounting hardware. Double-check all connections match the instruction manual exactly—incorrect connections could damage your furnace or thermostat. Once all furnace connections are complete, restore power to the HVAC system and verify the extender kit’s indicator light illuminates, confirming proper operation.
Step 5: Install the Thermostat Module and Connect Wires
At your thermostat location, install the wall plate for your new smart thermostat. Feed your existing thermostat wires through the wall plate opening. The power extender kit includes a small module that mounts behind your new thermostat—this communicates with the furnace-mounted extender kit to maintain continuous power.
Connect your labeled thermostat wires to the appropriate terminals on the new thermostat: R to power, W to heating, Y to cooling, and G to fan (if applicable). Connect the extender kit’s C-wire output to the C terminal on your thermostat. This completes the virtual C-wire circuit, providing continuous 24-volt power to your smart thermostat.
Step 6: Power On and Configure Your Thermostat
Turn the furnace breaker back ON and wait 30 seconds for your smart thermostat to power up. Most devices display a welcome screen or LED indicator confirming successful power connection. Follow the thermostat’s on-screen setup wizard to connect to your home Wi-Fi network, configure your heating and cooling preferences, and create a schedule.
Test your system by adjusting the thermostat temperature and confirming your furnace or air conditioner responds appropriately. Allow 24 hours of normal operation before relying on learning features or automation. If your thermostat loses power or fails to connect to Wi-Fi, troubleshoot by verifying all wire connections and confirming the power extender kit’s indicator light remains illuminated.
What Common Mistakes Should You Avoid During Installation?
Understanding common pitfalls prevents costly errors and ensures successful smart thermostat installation. Many DIY failures result from rushing the process, ignoring compatibility requirements, or making incorrect wire connections.
Mistake 1: Not Verifying C-Wire Necessity
Some homeowners purchase power extender kits unnecessarily when their HVAC system already includes a C-wire they didn’t notice. Before buying additional equipment, carefully trace all thermostat wires at both the furnace and thermostat. If you find five wires instead of four, you likely already have a C-wire and can skip the power extender kit entirely, saving $60-$150.
Mistake 2: Choosing Incompatible Equipment
Not all smart thermostats work with all power extender kits or HVAC systems. Purchasing a thermostat incompatible with your heating system or power solution results in wasted money and installation frustration. Always verify compatibility on the manufacturer’s website and read customer reviews from users with similar HVAC configurations before purchasing.
Mistake 3: Incorrect Wire Connections
Connecting wires to wrong terminals is the most common installation error and can damage both your thermostat and furnace. Photograph your old thermostat’s connections before removal, label each wire carefully, and follow your new thermostat’s instruction manual exactly. When in doubt, consult the manufacturer’s installation support line rather than guessing at wire placement.
Mistake 4: Forgetting to Turn Off Power
Working on HVAC electrical systems without turning off the breaker risks electrical shock and equipment damage. Always switch off furnace power, wait five minutes, and verify power is off using a non-contact voltage tester before touching any wires. This simple safety step prevents accidents and protects your equipment.
Mistake 5: Ignoring Thermostat Power Requirements
Some smart thermostats demand more power than older systems provide. If your furnace transformer outputs insufficient voltage or amperage, your thermostat will malfunction even with a power extender kit. Check your thermostat’s power requirements against your transformer specifications—if they don’t match, upgrade your transformer or choose a lower-power thermostat model.
How Do You Troubleshoot Power Issues After Installation?
Even careful installations sometimes experience power-related problems. Systematic troubleshooting identifies and resolves issues quickly, restoring full thermostat functionality.
Thermostat Loses Power Intermittently
If your thermostat powers off and on repeatedly, check all wire connections at both the furnace and thermostat. Loose connections cause intermittent power loss. Tighten any loose terminal screws and verify each wire seats fully in its terminal. If the problem persists, your power extender kit may be failing—contact the manufacturer for replacement.
Thermostat Won’t Power On
Confirm your furnace breaker is ON and the power extender kit’s indicator light illuminates. If the kit’s light is off, check furnace connections and verify the transformer provides power using a multimeter. If your thermostat still won’t power on, try removing and reinserting each wire to ensure proper seating. Persistent power issues may require professional HVAC technician assistance.
Wi-Fi Connectivity Drops
Insufficient power can cause Wi-Fi connectivity issues even if your thermostat appears powered. Verify your power extender kit’s indicator light is solid (not blinking), indicating stable power delivery. If the light blinks, your system is struggling to maintain power—consider upgrading your furnace transformer or running a dedicated C-wire.
Frequently Asked Questions
Can I install a smart thermostat without any C-wire solution?
No, smart thermostats require continuous 24-volt power to function properly. Without a C-wire or alternative power solution like a power extender kit or battery backup, your thermostat will lose connectivity, drain batteries rapidly, and fail to operate reliably. You must implement one power solution before installation.
How much does a C-wire installation cost?
Running a new dedicated C-wire costs $200-$400 for DIY installation with materials, or $500-$1,500 if hiring a professional electrician. Power extender kits cost $60-$150 and require no professional help, making them the most affordable solution for most homeowners in 2026.
Will a power extender kit work with heat-only systems?
No, power extender kits require both heating (W) and cooling (Y) circuits to function. Heat-only systems lack a cooling circuit, making power extender kits incompatible. Heat-only homes must either run a dedicated C-wire, upgrade their transformer, or choose a battery-powered thermostat.
How long does smart thermostat installation take?
DIY installation with a power extender kit typically takes 1-2 hours for experienced homeowners, or 2-4 hours for first-time installers. Running a dedicated C-wire requires 2-4 hours of DIY work or professional installation time. Battery-powered thermostat installation takes 30-45 minutes since no additional power equipment is needed.
Do all smart thermostats support power extender kits?
Most major brands including Ecobee, Google Nest, and Honeywell officially support power extender kits, but not all models do. Always verify compatibility on the manufacturer’s website before purchasing. Some budget-friendly or older thermostat models may lack power extender kit support.
Can I use a smart thermostat battery backup instead of a power extender kit?
Yes, many smart thermostats include rechargeable battery backup that charges during heating and cooling cycles. However, batteries alone don’t provide continuous power and may deplete during extended periods without HVAC activity. Battery backup works best as a supplement to another power solution, not as a standalone solution.
Is Installing a Smart Thermostat Without a C-Wire Worth the Effort in 2026?
Installing a smart thermostat without a C-wire is absolutely worth the effort in 2026, offering significant energy savings and convenience improvements despite the initial installation complexity. Modern smart thermostats deliver 10-15% annual energy savings through learning algorithms, remote temperature control, and detailed usage analytics. These benefits apply whether you use a power extender kit, run a new C-wire, or choose a battery-powered model—the key is selecting the right power solution for your specific HVAC system.
The investment in smart thermostat installation pays dividends through reduced heating and cooling costs, improved home comfort, and integration with broader smart home ecosystems. Power extender kits make C-wire-free installation accessible to homeowners without electrical expertise or budget for professional installation. For those willing to invest in running a dedicated C-wire, the long-term reliability and thermostat performance improvements justify the higher upfront cost.
If you’re already upgrading your smart thermostat, consider complementary energy management projects like conducting a DIY home energy audit or tracking energy use per appliance to maximize your efficiency gains. Smart thermostats work best as part of comprehensive home automation strategies that include automated lighting schedules and other connected devices. The combination of smart temperature control, energy monitoring, and automation creates a holistic approach to home efficiency that delivers measurable cost savings and environmental benefits throughout 2026 and beyond.









Write Your Review
No reviews yet. Be the first to share your experience!