

What Are Lighting Scenes and Why Do You Need Them?
Lighting scenes are preset configurations that control multiple smart bulbs simultaneously, adjusting brightness, color, and tone with a single command. Creating lighting scenes transforms your home into a responsive environment that adapts to your daily activities and moods. Whether you’re hosting dinner, working from home, or relaxing before bed, scenes save time and eliminate the need to adjust each bulb individually. In 2026, smart bulb technology has evolved to offer seamless scene creation across most major platforms and ecosystems.
Think of lighting scenes as shortcuts for your entire lighting setup. Instead of manually dimming five bulbs and changing their color temperature, one tap activates your perfect ambiance. Scenes enhance energy efficiency by ensuring lights operate at optimal levels for each activity. They also improve your quality of life by creating consistent, professional-looking lighting throughout your home without technical expertise.
Key Takeaway: Lighting scenes are powerful tools that automate multiple bulbs at once, saving time and creating perfect ambiance for any situation.
How Do You Choose the Right Smart Bulbs for Scene Creation?
Not all smart bulbs offer equal scene-creation capabilities. You’ll want bulbs that support color adjustment, brightness dimming, and integration with your chosen smart home platform. Popular 2026 options include Philips Hue, LIFX, Wyze, and Nanoleaf bulbs, each offering different features and price points. Compatibility with your existing smart home hub—whether Amazon Alexa, Apple HomeKit, or Google Home—is crucial for seamless scene automation.
Look for bulbs with the following capabilities:
- Full color spectrum support (16 million colors minimum).
- Adjustable color temperature from warm to cool white.
- Dimming capability from 1% to 100% brightness.
- Direct integration with your smart home ecosystem.
- Local control option if internet connectivity fails.
Comparing Popular Smart Bulb Brands
Philips Hue remains the industry standard for scene creation, offering intuitive apps and extensive customization. LIFX bulbs work without a hub and connect directly to Wi-Fi, ideal for smaller setups. Wyze provides budget-friendly options with solid scene support. Nanoleaf specializes in artistic lighting panels and accent lights. Choose based on your budget, room size, and existing smart home infrastructure.
Key Takeaway: Select smart bulbs with color, brightness, and temperature control that integrate with your chosen smart home platform.
What Are the Essential Steps to Create Your First Lighting Scene?
Creating your first lighting scene involves five core steps: selecting your smart home app, choosing bulbs for the scene, setting brightness and color, naming your scene, and testing it. Most platforms offer intuitive interfaces designed for beginners. The entire process typically takes under five minutes once your bulbs are installed and connected. For detailed installation guidance, see our step-by-step smart bulb installation guide.
Step-by-Step Scene Creation Process
- Open your smart home app (Philips Hue, LIFX, Apple HomeKit, etc.).
- Navigate to the “Scenes” or “Routines” section in your app’s main menu.
- Select “Create New Scene” or similar option.
- Choose which bulbs to include in your scene.
- Set brightness levels for each bulb (0-100%).
- Adjust color temperature if desired (warm white to cool white).
- Pick specific colors if your bulbs support full RGB.
- Name your scene descriptively (e.g., “Movie Night” or “Morning Routine”).
- Save and test your scene with a single tap.
Testing ensures all bulbs respond correctly and reach your desired settings. If any bulb doesn’t respond, check its connection and battery level. Most apps allow you to edit scenes anytime without recreating them from scratch.
Key Takeaway: Creating a scene takes minutes and involves selecting bulbs, adjusting settings, naming, and testing in your smart home app.
How Can You Design Scenes for Different Activities and Rooms?
Different activities require different lighting environments. Morning scenes should energize with bright, cool white light around 5000K color temperature. Work-from-home scenes need consistent, flicker-free lighting at 4000K to reduce eye strain. Evening relaxation scenes benefit from warm, dimmed light at 2700K to support melatonin production. Movie-watching scenes typically use very low ambient light with accent colors that complement your screen.
Room-specific scenes maximize functionality. Kitchen scenes should be bright for safety and food preparation. Bedroom scenes should transition from energizing morning light to sleep-promoting warm tones. Living room scenes offer flexibility for entertaining, relaxing, or working. Bathrooms benefit from bright, neutral lighting for grooming and softer tones for evening use.
Popular Scene Ideas for 2026
- Morning Energize: 100% brightness, 5000K cool white for alertness.
- Afternoon Work: 80% brightness, 4000K neutral white for focus.
- Dinner Party: 60% brightness, warm white with accent colors.
- Movie Night: 10% ambient light, accent colors matching content.
- Sleep Prep: 20% brightness, 2700K warm white for relaxation.
- Bedtime: 1-5% red light only to preserve sleep quality.
Creating Scenes for Specific Rooms
Kitchens need bright, white light at 4000-5000K for safety and visibility. Dining rooms work best at 2700-3000K with moderate dimming for ambiance. Bedrooms should support multiple scenes: energizing morning light, neutral daytime, and warm evening tones. Living rooms benefit from flexibility with entertainment, relaxation, and entertaining scenes. Bathrooms require bright light for grooming but appreciate softer options for nighttime visits.
Key Takeaway: Design room-specific scenes matching the activity’s lighting needs, from energizing morning light to sleep-promoting warm tones.
How Do You Automate Lighting Scenes with Schedules and Triggers?
Automation elevates scenes from manual controls to intelligent, responsive systems. Schedule scenes to activate at specific times—your morning scene triggers at 6:30 AM, work scene at 8:00 AM, and evening scene at 6:00 PM. Trigger-based automation activates scenes based on conditions like sunset, sunrise, geolocation, or specific times. Combining schedules and triggers creates a fully automated home that adapts without user input.
Most smart home platforms support automation. For comprehensive scheduling guidance, explore our smart lighting schedules guide. Automation works best when you establish consistent daily routines. Test automations for one week to ensure they match your actual schedule before making permanent adjustments.
Setting Up Time-Based Automation
- Open your smart home app and navigate to automations or routines.
- Create a new automation and select “Time” as the trigger.
- Set the specific time your scene should activate.
- Choose which scene to activate at that time.
- Enable repeat options (daily, weekdays, weekends).
- Save and test the automation at the scheduled time.
Using Triggers Like Sunset and Geolocation
Sunset automation ensures your evening scene activates when the sun sets, regardless of season. This feature supports circadian rhythm alignment—learn more in our circadian lighting setup guide. Geolocation triggers activate scenes when you arrive home or leave. Combine multiple triggers: your “Arriving Home” scene might activate when you’re within 500 meters of your address, automatically preparing your home before you arrive.
Key Takeaway: Automate scenes using time-based schedules, sunset triggers, and geolocation for truly intelligent, responsive lighting.
How Can You Control Scenes with Voice Commands and Apps?
Voice control offers the most convenient scene activation method in 2026. Simply say “Alexa, activate movie night” or “Hey Siri, turn on dinner party” to trigger your preset scenes instantly. Voice commands work from anywhere in your home and require no app navigation. Most smart bulb platforms support major voice assistants including Amazon Alexa, Google Assistant, and Apple Siri. For voice control setup details, see our voice command control guide.
App-based control offers more precision and visual feedback. Your smart home app displays all available scenes with icons and descriptions. Tap any scene to activate it instantly. Apps also allow quick adjustments if a scene doesn’t match your current mood. Many users combine voice and app control: voice for quick activation, apps for fine-tuning.
Setting Up Voice Control for Scenes
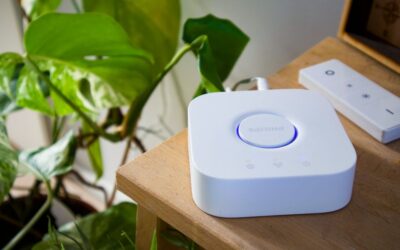
- Ensure your smart home hub is properly set up and connected.
- Enable voice assistant integration in your bulb app settings.
- Create or select your scene in the app.
- Name your scene clearly (avoid complex names).
- Test voice activation with your assistant.
- Adjust wake word and phrasing if recognition fails.
Key Takeaway: Control scenes via voice commands for convenience or apps for precision, combining both methods for optimal flexibility.
What Advanced Features Enhance Your Scene Experience in 2026?
Advanced features transform basic scenes into sophisticated lighting systems. Transition time settings control how quickly bulbs change colors—instant changes for movie scenes, gradual transitions for morning wake-up scenes. Scene layering allows multiple scenes to stack, with one scene providing base lighting and another adding accent colors. Conditional logic activates different scenes based on multiple factors: if it’s after sunset AND someone’s home AND the living room motion sensor detects movement, activate the entertaining scene.
Integration with multiple smart home platforms creates flexibility. If you use both Apple HomeKit and Amazon Alexa, you can control the same scenes from either ecosystem. Cross-platform integration requires bulbs supporting multiple protocols—Philips Hue and LIFX excel here. For detailed integration guidance, visit our multi-brand smart home integration guide.
Advanced Scene Customization Options
- Transition timing: Control how quickly bulbs shift between settings (0.5 to 60 seconds).
- Scene layering: Stack multiple scenes for complex lighting effects.
- Conditional automation: Activate scenes based on multiple simultaneous conditions.
- Adaptive scenes: Scenes that change throughout the day based on time.
- Sensor integration: Activate scenes when motion, temperature, or light sensors detect changes.
Creating Adaptive Scenes That Change Throughout the Day
Adaptive scenes modify their settings based on time of day. Your “Home Office” scene might activate at 60% brightness with 4000K white light at 8 AM, automatically dim to 50% at 2 PM to reduce afternoon glare, then warm to 3000K at 4 PM as natural light fades. This approach supports productivity and circadian rhythm alignment without manual adjustments. Most advanced smart home platforms support this through automation rules or scene scheduling features.
Key Takeaway: Advanced features like transition timing, scene layering, and conditional logic create sophisticated, responsive lighting systems.
How Do You Troubleshoot Common Lighting Scene Issues?
Common scene problems include bulbs not responding, colors appearing different than expected, or automations failing to trigger. Most issues stem from connectivity problems, outdated firmware, or app glitches. Start troubleshooting by checking that all bulbs show as “connected” in your app. Restart your smart home hub by unplugging it for 30 seconds, then plugging it back in. This simple step resolves 70% of connectivity issues.
Firmware updates often fix scene-related bugs. Check your smart bulb app for available updates and install them immediately. If bulbs still don’t respond, move closer to your Wi-Fi router or smart home hub to improve signal strength. Bulbs more than 30 feet from your hub may experience connectivity issues.
Quick Troubleshooting Checklist
- Verify all bulbs show “connected” status in your app.
- Restart your smart home hub and Wi-Fi router.
- Check for and install firmware updates for all bulbs.
- Move bulbs closer to your Wi-Fi router or hub if needed.
- Delete and recreate the problematic scene from scratch.
- Ensure your smart home app has permission to access location and notifications.
- Contact manufacturer support if issues persist after these steps.
Resolving Color and Brightness Issues
If scene colors appear wrong, your bulbs may not support the specific color range. Check your bulb’s color specifications—some budget models support fewer colors than premium options. Brightness issues often indicate dimmer compatibility problems. Ensure your bulbs work with your existing dimmer switches if applicable. If scenes activate at unexpected brightness levels, manually adjust the scene settings in your app and save again.
Key Takeaway: Most scene issues resolve through hub restarts, firmware updates, and checking bulb connectivity status.
What Are the Best Practices for Organizing and Managing Multiple Scenes?
As your smart home grows, organizing scenes becomes essential for usability. Create scenes with clear, descriptive names: “Movie Night” rather than “Scene 1,” “Morning Energize” instead of “Wake Up.” Group related scenes together using folders or categories if your app supports them. Most platforms allow you to reorder scenes, placing frequently-used ones at the top for quick access. Limit each room to 4-6 scenes to avoid overwhelming yourself with options.
Document your scenes in a simple spreadsheet noting the scene name, room, time of use, and settings. This reference helps when troubleshooting or adjusting scenes later. Review your scenes quarterly—delete ones you never use and create new ones matching seasonal changes or lifestyle adjustments. A well-organized scene library enhances your smart home experience and makes it easier to share controls with family members.
Scene Organization Best Practices
- Use descriptive, activity-based scene names (“Movie Night,” not “Scene 5”).
- Group scenes by room or time of day for logical organization.
- Place frequently-used scenes at the top of your scene list.
- Limit each room to 4-6 essential scenes to prevent confusion.
- Document scene settings in a spreadsheet for reference.
- Review and update scenes seasonally or when routines change.
Key Takeaway: Organize scenes with clear names, logical grouping, and regular reviews to maintain an intuitive, functional smart home.
How Does Lighting Scene Integration Work with Other Smart Home Devices?
Lighting scenes integrate seamlessly with other smart home systems to create comprehensive automation. When your smart doorbell detects a visitor, a scene can activate bright, welcoming light in your entryway. Your security system can trigger different scenes based on armed status: bright scenes when disarmed, subtle accent lighting when armed for nighttime. Smart thermostats coordinate with lighting scenes—your morning energize scene activates simultaneously with heating adjustments for complete home automation.
Entertainment systems benefit significantly from scene integration. When you press play on your smart TV, a movie scene automatically activates, dimming ambient light and setting accent colors. Smart speakers can trigger scenes through voice commands while also providing audio feedback. For comprehensive smart home setup guidance, see our beginner’s smart home setup guide.
Common Smart Home Integration Scenarios
- Security system: Activate “Armed” scene when security system activates.
- Smart doorbell: Trigger bright entryway scene when visitor detected.
- Entertainment system: Activate movie scene when TV turns on.
- Smart thermostat: Coordinate lighting with temperature adjustments.
- Motion sensors: Activate room scenes when occupancy detected.
- Smart speakers: Control scenes through voice and audio routines.
Key Takeaway: Lighting scenes integrate with security, entertainment, climate, and occupancy systems for comprehensive home automation.
What Security Considerations Should You Keep in Mind for Smart Lighting Scenes?
Smart lighting scenes involve connected devices that require security attention. Ensure your Wi-Fi network uses strong passwords and WPA3 encryption if available. Keep your smart home hub and all bulbs updated with the latest firmware—updates often include security patches. Create strong, unique passwords for your smart home app account, enabling two-factor authentication when available. Avoid using obvious scene names or automations that reveal when you’re away—use generic names like “Absence” rather than “Away on Vacation.”
Review app permissions regularly, ensuring your smart home app only accesses necessary features like location and notifications. Disable remote access features if you don’t use them. For comprehensive smart home security guidance, visit our smart home security guide. Regularly audit which devices and people have access to your lighting scenes, removing old accounts or devices you no longer use.
Key Takeaway: Protect your smart lighting system with strong passwords, firmware updates, and careful permission management.
How Can You Create Lighting Scenes That Support Your Health and Wellness?
Lighting profoundly affects sleep, mood, and productivity. Scenes supporting circadian rhythm alignment improve sleep quality and daytime alertness. Morning scenes with cool, bright light (5000K at 80-100% brightness) suppress melatonin and enhance wakefulness. Evening scenes with warm, dim light (2700K at 10-20% brightness) promote melatonin production for better sleep. Avoid bright, cool light after 8 PM—your “Evening Wind Down” scene should gradually transition to warmer tones throughout the evening.
Work-from-home scenes should minimize eye strain through consistent, flicker-free lighting at 4000K. Avoid direct overhead lighting; instead, use indirect illumination from multiple bulbs. Relaxation scenes benefit from warm light and optional accent colors that promote calm—soft blues and greens support relaxation while reds and oranges energize. For detailed circadian rhythm guidance, see our circadian lighting setup guide.
Health-Focused Scene Guidelines
- Morning (6-8 AM): 5000K cool white, 80-100% brightness for alertness.
- Daytime (8 AM-6 PM): 4000K neutral white, 70-80% brightness for focus.
- Evening (6-8 PM): 3000K warm white, 50-60% brightness for transition.
- Night (8 PM-midnight): 2700K warm white, 10-20% brightness for wind-down.
- Sleep (midnight onward): Red light only or complete darkness for optimal sleep.
Key Takeaway: Design wellness-focused scenes that align with circadian rhythms, supporting better sleep, mood, and productivity throughout the day.
What’s the Future of Smart Lighting Scenes in 2026 and Beyond?
Smart lighting technology continues evolving rapidly. Machine learning algorithms are beginning to learn user preferences automatically, creating personalized scenes without manual input. AI-powered systems analyze your behavior patterns and suggest optimal lighting for different times and activities. Biometric integration is emerging—future scenes may adjust based on heart rate, stress levels, or sleep patterns detected by wearable devices. Augmented reality apps allow you to visualize scene colors before applying them to your actual bulbs.
Interoperability standards are improving, making it easier to create scenes across different brands without compatibility concerns. Matter protocol adoption in 2026 promises seamless integration regardless of manufacturer. Energy efficiency continues improving with more bulbs achieving 80+ lumens per watt. Future scenes will likely incorporate dynamic color-changing capabilities responding to music, movies, or ambient conditions in real-time.
Key Takeaway: Future smart lighting scenes will leverage AI, biometrics, and improved interoperability standards for increasingly intelligent, personalized automation.
How Can You Get Started Creating Lighting Scenes Today?
Begin your smart lighting scene journey by assessing your current setup. If you don’t have smart bulbs yet, start with one room and 2-3 bulbs to understand the technology before expanding. Choose a platform—Philips Hue for premium features, LIFX for hub-free operation, or Wyze for budget-friendly options. Install your bulbs following manufacturer instructions, then create your first scene using the step-by-step process outlined earlier. Start with simple scenes like “Movie Night” and “Morning Wake-Up” before exploring advanced features.
Join online communities and forums where smart home enthusiasts share scene ideas and troubleshooting tips. Many manufacturers offer free training resources and video tutorials. Experiment with different colors, brightness levels, and transition times to discover what works best for your space and preferences. Remember that scenes are easily edited—don’t hesitate to adjust them as you learn what you prefer.
Key Takeaway: Start with one room, choose a compatible platform, create simple scenes first, and gradually explore advanced features as you gain confidence.
Conclusion: Mastering Lighting Scenes for Your Smart Home
Creating lighting scenes with smart bulbs transforms your home into an intelligent, responsive environment that adapts to your daily needs and preferences. From morning energizing light to evening relaxation scenes, well-designed scenes enhance comfort, productivity, and sleep quality. The process is straightforward: select compatible bulbs, choose your smart home platform, create scenes with clear names, and automate them based on schedules or triggers. In 2026, technology has matured enough that beginners can create sophisticated lighting systems without technical expertise.
Start simple with basic scenes in one room, then expand to additional spaces as you gain confidence. Leverage automation to make your lighting truly intelligent, responding to time, location, and conditions without manual intervention. Organize your scenes thoughtfully, document your settings, and review them regularly as your needs evolve. Whether you’re optimizing for wellness, entertainment, productivity, or ambiance, smart lighting scenes provide the flexibility to create perfect lighting for any situation. Your smart home journey begins with a single scene—take that first step today.




Write Your Review
No reviews yet. Be the first to share your experience!